Changing your manual transmission fluid is important to keep your transmission healthy and shifts smooth. Over time, the oil loses its critical properties that prevent metal on metal contact. This is a easy do-it-yourself as long as you have the proper tools and ability to get your vehicle off the ground safely. If you are unsure, please visit a certified mechanic.
While Porsche recommends changing the transmission oil every 12 years or 120,000 miles, we believe this is too long. To get an overview of the procedure, check out the video from Ovalbore. Detailed step-by-step instructions along with tools, parts, and exact specifications can be found below.
- Mechanic’s Tool Set
- Metric Hex Bit Socket Set, 3mm to 10mm
- 3/8 Inch Drive Click Torque Wrench (10-80 ft.-lb.)
- K Tool International Low Profile Jack (3.33 Ton)
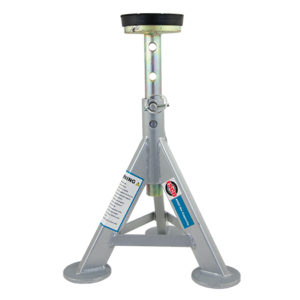
- ESCO 10499 Low Profile Flat Top Jack Stands (Pair) (4 required)
- Wheel Chocks
- Oil Drain Pan, 16 Quarts Capacity
- Fluid Transfer Pump Kit
- Disposable Gloves
- Safety Glasses
Manual transmission fill & drain bolts: 30 ft-lbs
Manual transmission oil capacity: 3.2 liters
Step 1: Prepare your vehicle and work area.
- Starting with a cold engine, take your car for a 5 minute drive to warm up the transmission oil. This will help the oil drain more easily.
- Put on eye protection and gloves.
- Park your car on a level surface.
- Gather parts and tools.
Step 2: Raise your vehicle off the ground
- To give yourself enough clearance to work, safely raise your vehicle using a lift or jack and jack stands.
- ENSURE YOUR CAR IS LEVEL! This is essential to ensure the correct fluid level.
- NEVER rely on a jack to keep your car up; use jack stands to safely support your vehicle.
- Also be sure to use wheel chocks to prevent your car from rolling.
- To lift your vehicle on jack stands, check out this helpful video from CarFanatic.
- While it is for the Porsche 997, the procedure is nearly the same except for jacking the rear.
- To get the rear of the 981 on jack stands, jack the rear where the sway bar mounts to the chassis. Be sure to use a jack pad to prevent damage.
- Once your car is on jack stands, give your car a hard shove to make sure it is secure.
Step 3: Remove the metal support plate covering the transmission
- Unscrew the 15mm fasteners holding the diagonal braces in place, then remove the diagonal braces.
- Unscrew the 15mm fasteners holding the support plate, then remove the support plate.
- Note: With the diagonal braces and support plate, the wheels cannot support the vehicle. If you need to put the wheels on the ground, reinstall these parts first. Also, any time you loosen or remove the diagonal braces, you will need to get an alignment afterwards.
Step 4: Remove the manual transmission fill bolt
- Locate an oil fill plug on the driver side of the gearbox housing and just in front of the CV axle.
- Use a ratchet, appropriate length extension, and a 10mm hex bit to break loose and remove the fill plug.
- If you cannot remove the fill plug, STOP AND DO NOT PROCEED as you will not be able to add new oil.
Step 5: Drain the manual transmission oil
- Locate the oil drain plug at the bottom of the transmission pan.
- Break the drain plug loose using a 10mm hex bit and ratchet, but don’t remove it.
- Position an oil catch pan underneath the transmission and remove the oil drain plug. Make sure to catch it before it falls into the oil catch pan.
- Let the oil drain for at least 15 minutes.
- Reinstall the oil drain plug with a NEW sealing ring and torque it to 30 ft-lbs using a torque wrench.
Step 6: Add new oil to the manual transmission
- Note: Before filling you transmission, make sure the vehicle is level so you can fill the oil to the correct level.
- Add ~3.2 liters of transmission fluid in the fill bolt hole using a fluid transfer pump as showing in this video from BleeingJeep.
- Once oil comes out of spills out of the fill hole, you’ve reached the correct oil level.
- Remove the pump hose and wipe off any oil residue.
- Refit the oil fill bolt along with a new sealing ring and tighten it to 30 ft-lbs with a torque wrench.
- Ensure there are no leaks.
Step 7: Reinstall everything in reverse
- Reinstall the metal support plate was removed, reinstall it and torque it as follows:
- Torque support plate fasteners to 48 ft-lbs.
- Torque fasteners that connect the diagonal braces to the support plate and rear axle cross member to 48 ft-lbs.
- Torque fasteners that connect diagonal braces to vehicle body to 22 ft-lbs, then tighten them an additional 1/4 turn.
- Lower your vehicle back on the ground.
- Clean up your work area and put away your tools.
- Save the used oil in a container, so you can recycle it at your local auto parts store.
- Note: If you the metal support plate was removed, Porsche states that you will need to get an alignment.


