Engine oil is vital to your car’s engine. It’s primary function is to protect internal moving parts by providing lubrication to reduce friction and metal on metal contact. Over time the oil loses its critical properties, so regular replacement of the oil and filter are essential to maintaining your vehicle’s engine.
Porsche recommends replacing your engine oil and filter every 10,000 miles or once a year, whatever comes first. However, we recommend a 5,000 miles or once per year interval to help extend the life of your vehicle’s engine. Replacing the engine oil is a simple job that doesn’t require many tools, making it suitable even for novice do-it-yourselfers. Before getting started, take a look at video from the YouTube channel, Useful Vids, to get an overview. Detailed step-by-step instructions along with tools, parts, and exact specifications can be found below.
- Mechanic’s Tool Set
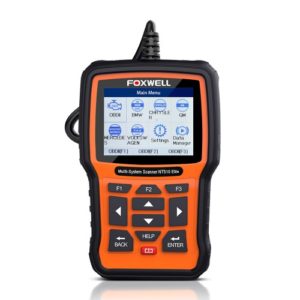
- Foxwell NT530 OBD2 Diagnostic Scanner (for Porsche)
- 36MM Oil Filter Cap Socket
- 3/8 Inch Drive Click Torque Wrench (10-80 ft.-lb.)
- Magnetic Torx Screwdrivers Set, T5 to T40
- Oil Drain Pan, 16 Quarts Capacity
- Plastic Funnel, 16 oz.
- RhinoGear Vehicle Ramp – Set of 2 (12,000lb. GVW Capacity)
- Wheel Chocks
- Disposable Gloves
Oil drain plug: 22 ft-lbs
Oil filter housing: 19 ft-lbs
Shear brace bolts: 24 ft-lbs
Engine oil capacity: 8.5 liters (with filter included)
Step 1: Prepare the vehicle
- The oil will drain more efficiently if it’s hot, so run the engine for 10 minutes to get it up to temperature.
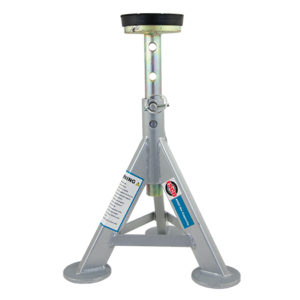
- On a flat surface, drive the front of your car on vehicle ramps to get extra clearance for working underneath it. Alternatively, you can use a jack and jack stands on the vehicle’s approved lifting points.
- Engage the parking brake and place wheel chocks behind the rear wheels to prevent the vehicle from rolling.
Step 2: Remove panels
- Locate and remove 20 T25 Torx screws that hold the underbody panel and then slide the panel out of the way
- Remove the shear brace that obstructs the access to the oil filter housing. It is held in place with 13mm bolts.
Step 3: Drain the old oil
- Locate the oil drain plug and loosen it using an 8mm hex socket and ratchet. However, don’t remove the drain plug all the way.
- Position the large oil catch pan underneath the oil drain plug. With rubber gloves on, unscrew the drain plug and remove it quickly so it doesn’t fall into the oil catch pan.
- Let the oil drain for at least 15 minutes.
- Reinstall the oil drain plug along with a new crush washer. Tighten the drain plug to 22 ft-lbs using a torque wrench.
Step 4: Replace the oil filter
- On the right-hand side of the engine, above the oil pan, locate the oil filter housing and place a small oil drain pan underneath it.
- Remove the oil filter cap using a 36mm oil filter socket and ratchet.
- Guide the oil filter element out and dispose of it into the oil drain pan.
- Using a small flathead screwdriver, carefully remove the old rubber gasket on the oil filter cap. Be careful not to scratch the oil filter cap in the process.
- Slide the new gasket onto the oil filter cap and smear a small amount of oil over it to lubricate the seal.
- Install the new filter element and make sure it sits correctly on the central part of the housing.
- Torque the oil filter cap to 19 ft-lbs.
Step 5: Fill in new engine oil
- Under the hood, locate the oil filler cap. Using a funnel, add 7.5 liters of new oil. Check under the car to ensure there are no oil leaks.
- Reinstall the shear brace and tighten the bolts to 24 ft-lbs using a torque wrench.
- Refit the underbody panel and reinstall all T25 torx screws
- Lower your car back down. If you’re using vehicle ramps, you can just put your car in neutral and let it roll back down.
Step 6: Ensure the engine oil has been filled to the correct level
- Start engine and allow it to warm up.
- When the car is sufficiently warm, you can have your onboard computer measure the oil level by selecting “Oil” on your gauge cluster.
- The upper line of the digital oil level reading is the max.
- The lower line of the digital oil level reading is the minimum.
- Each increment represents a little less than 0.42 quarts.
- Based on the reading, turn off your engine and add more oil as needed.
Step 7: Reset the vehicle's service indicator
- To reset your service indicator, you will need a tool like the Foxwell NT530.
- Connect the diagnostic tool to the OBDII port and turn the ignition to the “ON” position.
- Go through the menus on the diagnostic tool.
- You should be able to select your vehicle and find an “oil lamp reset” functionality.
- To get a general sense of how such diagnostic tools work, check out the following video. While the iCarSoft POR II featured would work, we recommend the Foxwell because it has additional features like the ability to register a new battery to your vehicle.
Step 8: Collect all of your tools and clean up
Note: Engine oil is damaging to the environment. Take your used engine oil to any local auto parts store to recycle it.
