Changing your manual transmission fluid is important to keep your transmission healthy and shifts smooth. Over time, the oil loses its critical properties that prevent metal on metal contact. This is a easy do-it-yourself as long as you have the proper tools and ability to get your vehicle off the ground safely. If you are unsure, please visit a certified mechanic.
Before you get started, check out the video from YouTuber, EatSleepDrive to get an overview. While this video covers the 997 generation specifically, the procedure is very similar for the 991 generation. Detailed step-by-step instructions can be found below.
- K Tool International Low Profile Jack (3.33 Ton)
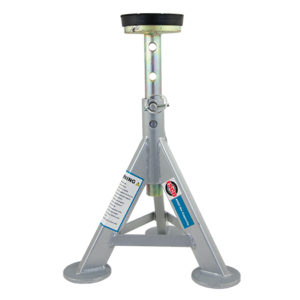
- ESCO 10499 Low Profile Flat Top Jack Stands (Pair) (4 required)
- Wheel Chocks
- Metric Hex Bit Socket Set, 3mm to 10mm
- 3/8 Inch Drive Click Torque Wrench (10-80 ft.-lb.)
- Torx Bit Socket Set, T10-T60
- Mechanic’s Tool Set
- Fluid Transfer Pump Kit
- Oil Drain Pan, 6 Quarts Capacity
- Disposable Gloves
- Safety Glasses
Transmission fluid drain bolt: 26 ft-lbs
Transmission fluid fill bolt: 26 ft-lbs
Manual transmission oil capacity: 3.3 liters
Step 1: Prepare your vehicle and work area.
- Take your car for a short 5 minute drive; this will help warm up your transmission oil to help it drain better without getting your car too hot to work on.
- Put on eye protection and gloves.
- Park your car on a level surface.
- Gather parts and tools.
Step 2: Raise your vehicle off the ground.
- To give yourself enough clearance to work, safely raise your vehicle using a lift or jack and jack stands.
- ENSURE YOUR CAR IS LEVEL! This is essential to ensure the correct fluid level.
- NEVER rely on a jack to keep your car up; use jack stands to safely support your vehicle.
- Also be sure to use wheel chocks to prevent your car from rolling.
- Once your car is on jack stands, give your car a hard shove to make sure it is secure.
- To lift your vehicle on jack stands, check out this helpful video from CarFanatic.
Step 3: Remove the underbody panels.
- Remove the two rear underbody panels which are held on by 10mm bolts and T25 screws.
Step 4: Remove the transmission fill plug.
- With the underbody panels off, you now will see the transaxle (note: transaxle = transmission and differential are one unit).
- Locate transmission oil fill bolt, which is located on the passenger side of the transmission.
- Remove the fill bolt using a 10mm hex socket. If you cannot get the fill bolt off, STOP and do not drain the fluid or you will be unable refill the transmission oil.
- If you can remove it, proceed to the next step.
Step 5: Drain the manual transmission oil.
- Locate the oil drain bolt which is located on the bottom of the transmission.
- Get a drain pan that can hold at least 3 quarts of fluid and place it under the drain bolt.
- Remove the drain bolt using a 10mm hex socket.
- Allow the transmission fluid to drain for 15 minutes.
Step 6: Replace the transmission oil drain bolt.
- Re-install the oil drain bolt and torque it to 26 ft-lbs.
- Be sure to use a new crush washer or the transmission oil will likely leak.
Step 7: Add new transmission oil.
- Add ~3.3 liters of transmission fluid in the fill bolt hole using a fluid transfer pump as showing in this video from BleeingJeep.
- As long as your car is level, when oil starts dripping out of the fill hole, you’ve reached the right capacity.
Step 8: Replace the transmission oil fill bolt.
- Re-install transmission oil fill bolt and torque it to 26 ft-lbs.
- Be sure to use a new crush washer or your transmission oil will likely leak.
Step 9: Reinstall everything in reverse.
- Ensure there are no fluid leaks.
- Re-install the underbody panels and just hand tighten the fasteners; they don’t need to be torqued much.
- Lower your vehicle back on the ground.
- Clean up your work area and put away your tools. You’re all done!


