When it comes to saving money maintaining your car, changing your own brake pads is one of the best ways. Another thing to consider is whether you should change out just your brake pads or both the brake pads and rotors. Most manufacturers recommend changing the brake pads and rotors at the same time. While we generally agree, if your brake rotors are evenly worn and have sufficient thickness remaining, you can just replace the brake pads.
Porsche states that the brake pads and rotors must be replaced together. While we generally agree with this approach, if your brake rotors still have a lot of life left and are evenly worn, you can get away with just replacing the brake pads. Additionally when replacing the brake pads, we highly recommend replacing the brake hardware clips to prevent brake noise. To perform this DIY, check out this helpful tutorial above from Yichen Lu. While the video covers the process on a Macan GTS, the steps are nearly identical for the S model. Detailed steps can be found below.
Note: Not for vehicles equipped with Porsche Carbon Ceramic Brakes (PCCB).
- Mechanic’s Tool Set
- 10-Piece Triple Square Socket Set, Metric 4mm – 18mm
- Torx Bit Socket Set, T10-T60
- K Tool International Low Profile Jack (3.33 Ton)
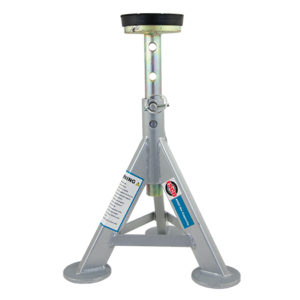
- ESCO 10498 Performance Jack Stands (Pair)
- Wheel Chocks
- 1/2″ Drive Extension Breaker Bar
- 1/2 Inch Drive Click Torque Wrench (25-250 ft.-lb.)
- 1/2-Inch Drive 19MM Non-Marring Lug Nut Socket
- Wheel Bolt Guide For Porsche, Audi, and VW (2 recommended)
- Socket Adapter & Reducer Set
- Brake Pad Spreader Tool
- Turkey Baster
- Medium Strength Thread Locker
- Loctite Silver-Grade Anti-Seize
- Permatex Ultra Disc Brake Caliper Lube
- CRC Brake Cleaner
- Disposable Gloves
- Safety Glasses
- Respiratory Mask
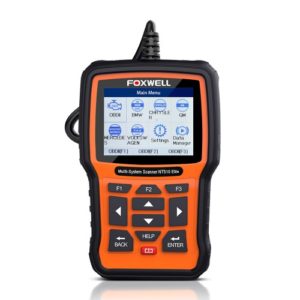
- Foxwell NT530 OBD2 Diagnostic Scanner (for Porsche) (optional method for disabling electronic parking brake)
- Ferodo OE Equivalent Brake Pad Set - P/N: FDB4064 (front, 1 set required)
- Akebono OE Rear Brake Pads - P/N: EUR1547A (rear, 1 set required)
- Zimmermann OE Brake Rotor - P/N: 460155220, 95B615301T (front left, 1 required)
- Zimmermann OE Brake Rotor - P/N: 460155320, 95B615302R (front right, 1 required)
- Zimmerman OE Brake Rotor - P/N: 100335820, 95B615601G (for rear brakes, 2 required)
- URO Brake Pad Wear Sensor - P/N: 95B907253 (for front brakes, 2 required)
- Brake Pad Wear Sensor - P/N: 4G0615121 (for rear, 2 required)
- Genuine Porsche Brake Caliper Bolt - P/N: WHT004571 (4 total required for front brakes)
- Genuine Porsche Disc Brake Hardware Kit - P/N: 97035195901 (2 recommended for front brakes)
Front Caliper Bolts: Torque initially to 22 ft-lbs, then turn clockwise an additional 90 degrees
T30 Brake Rotor Set Screws: 12 ft-lbs
Rear caliper bolts: 26 ft-lbs
Rear caliper bracket bolts: 48 ft-lbs
Front rotor retaining bolt: 12 ft-lbs
Step 1: Prepare your vehicle and work area
- Ensure your car is parked on a flat surface and the brakes are cool.
- Put on eye protection and gloves.
- Gather tools and parts.
Step 2: Extract a small amount of brake fluid from the brake fluid reservoir
- Extract a little bit of brake fluid from the reservoir to prevent it from overflowing during this procedure.
- To do this, open front compartment area, remove the plastic panel covering brake fluid reservoir.
- Unscrew the brake fluid reservoir cap, remove the mesh filter inside, and extract a little bit of brake fluid using a new turkey baster.
- Save this brake fluid in a clean container, so you can re-use it later.
- Reinstall the brake fluid reservoir cap when you are done to prevent debris from getting in.
Step 3: Raise your vehicle off the ground
- You can raise your car one corner at a time or raise the entire vehicle.
- To do this, either use a vehicle lift or a jack and jack stands.
- NEVER rely on a jack to keep your car up; use jack stands to safely support your vehicle.
- Also be sure to use wheel chocks to prevent your car from rolling.
- Be sure to loosen your wheel bolts before you lift the wheel off the ground.
- Note: If your car has air suspension, disable the leveling system by starting the vehicle and holding the “high level” control for 10 seconds; an indicator will appear in the gauge cluster letting you know the leveling system has been disabled. Failure to disable auto-leveling can result in suspension damage.
Step 4: Starting with one of the front corners, remove the wheel to gain access to the brakes
- Remove the wheel using a 19mm socket and breaker bar.
- Place two wheel guide bolts to help you remove the wheel.
Step 5: Remove the brake pads
- Disconnect the brake wear indicator by pushing the clip at the connector and pulling it out at the same time; with connector free, turn it 90 degrees and pull it out of the metal bracket.
- Locate the two bolts at the back side of the caliper and remove them using a breaker bar and a 14mm triple-square socket.
- Pull the caliper off the brake rotor; this may take some wiggling.
- Once free, tie the brake caliper to an upper control arm using rope or a bungee cord; this will prevent damage to the brake line.
- With old pads still inside the caliper, push in caliper pistons using a brake caliper spreader tool; this will allow the new, thicker brake pads to fit over the rotor.
- Remove the brake pads from the calipers by hand.
- Remove the brake pad clips (if you will be replacing it).
- If just replace brake pads, skip to step 7.
Step 6: Replace the brake rotor
- Remove the T30 torx screw holding the brake rotor in place; if you have trouble getting this off, use an impact screwdriver (see tools section).
- If you have difficulty getting the brake rotor off, apply some penetrating oil to where it meets the hub and use a hammer to lightly tap around the wheel hub area; let the penetrating oil get to work for a few minutes, then use a rubber mallet to loosen the rotor.
- Put on fresh disposable gloves and take out the brake rotor from the box; you don’t want to get any contaminants on the braking surface.
- Additionally, some brake rotors come with a protective film; to be safe, clean off the brake rotor surfaces with brake cleaner and paper towels.
- Apply anti-seize to where the rotor meets the wheel hub and to the brake rotor set screws to prevent them from seizing in the future.
- Install the new brake rotor and torque the T30 set screw to 12 ft-lbs or just hand-tighten.
Step 7: Install the new brake pads
- Install the new brake pad clips.
- Apply brake lubricant around the edges of the brake pad to prevent squealing.
- Connect the new brake pad sensors to the brake pads.
- Insert the new brake pads into the brake caliper.
- Re-install everything in reverse.
- The front brake caliper bolts are “yield-to-torque” bolts that are designed to stretch; they can only be used once.
- Be sure to replace the front brake caliper bolts with NEW ones and torque them to 22 ft-lbs initially, then turn them an additional 90 degrees clockwise.
- Torque the wheel bolts to 118 ft-lbs and be sure tighten the wheel bolts in a star pattern.
Step 8: Repeat the prior steps on the other front corner of the vehicle
Step 9: Remove the rear brake caliper and pads
- The process for replacing the rear brake pads and rotors is similar, but there are a few key differences.
- For an overview, check out this other video from Yichen Lu.
- Gain access to the brakes by removing the wheel.
- Remove the sliding brake caliper which is held on by two 13mm bolts; while holding the nut by the rubber dust boot with locking needle nose pliers or a thin wrench, use a 13mm socket and ratchet to remove the bolts.
- Completely disconnect the brake pad sensor; unplug the connector, remove the connector from the bracket by tilting and turning it, undo the rubber bleeder valve cover, and then remove the sensor from the brake pad.
- Move the brake caliper out of the way and tie it up so it doesn’t hang on the brake line.
- Remove the old brake pads and clips.
- If you’re not replacing the rear brake rotors, skip to step 11.
Step 10: Replace the rear brake rotor
- If replacing the rear brake rotors, you don’t need to take off the brake caliper bracket.
- Simply remove the T30 torx set screw, work the brake rotor loose by tapping it with a hammer (if necessary), and slide the rotor out.
- Install the new brake rotor using the same steps as for the front brake rotors.
Step 11: Install the new rear brake pads
- Install the new brake pads and clips.
- To install the brake caliper over the brake pads, you will need to use a brake pad spreader or c-clamp to depress the piston; however, before you can do this, you will need to put the electronic parking brake (EPB) is service mode using a diagnostic tool such as the Foxwell NT530 (listed in tools section).
- Alternatively, as shown in the video from DriftKr6l, you can manually disengage the EPB. To do so, remove the EPB motor by disconnecting the connector and removing the two T30 torx bolts; then use 8mm triple square socket to rotate the EPB spindle hub on the caliper clockwise until it stops.
- Now you can depress the piston.
- After fitting the brake caliper over the brake pads, apply medium strength threadlocker to the 13mm bolts and torque them to 26 ft-lbs.
- If you removed the EPB motor, reinstall it, apply threadlocker to the T30 bolts and hand tighten them.
- Reinstall everything else and torque the wheel bolts to 118 ft-lbs using a star pattern.
Step 12: Repeat the prior steps on the other rear corner
Step 13: Top off the brake fluid reservoir if needed
- Before driving your car, depress the brake pedal with the engine off.
- Top off your brake fluid reservoir as needed.
Step 14: Clean up your work area
- If you want to save some money on your brake job, take your brake rotors to your local metal recycler where they will actually pay you.
- Additionally, don’t just throw your brake pads in the trash because they are harmful to the environment. Contact your local waste management company and auto parts store to figure out the best way to dispose of them.
