Engine oil is vital to your car’s engine. It’s primary function is to protect internal moving parts by providing lubrication to reduce friction and metal on metal contact. Over time the oil loses its critical properties, so regular replacement of the oil and filter are essential to maintaining your vehicle’s engine.
Porsche recommends replacing your engine oil and filter every 10,000 miles or once a year, whatever comes first. However, we recommend a 5,000 miles or once per year interval to help extend the life of your vehicle’s engine. Replacing the engine oil is a simple job that doesn’t require many tools, making it suitable even for novice do-it-yourselfers. Before getting started, take a look at a video from the YouTube channel, Alex C, to get an overview. Detailed step-by-step instructions along with tools, parts, and exact specifications can be found below.
- Mechanic’s Tool Set
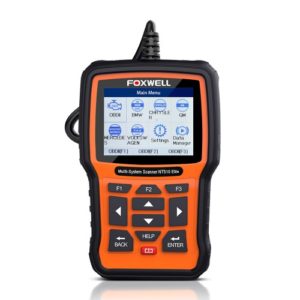
- Foxwell NT530 OBD2 Diagnostic Scanner (for Porsche)
- Low Profile Vehicle Ramps, 2.2 Ton Capacity, Pair
- Wheel Chocks
- 36MM Oil Filter Cap Socket
- 3/8 Inch Drive Extension Set
- 3/8 Inch Drive Click Torque Wrench (10-80 ft.-lb.)
- Magnetic Torx Screwdrivers Set, T5 to T40
- Oil Drain Pan, 16 Quarts Capacity
- Long Neck Fluid Funnel
- Disposable Gloves
- Safety Glasses
Oil filter housing: 19 ft-lbs
Engine oil capacity: 8.0 liters
Step 1: Prepare your vehicle and work area
- Warm up the engine by driving your car around for 5 minutes. This will help the oil flow more easily.
- Gather required tools and parts and put on gloves and eye protection.
- Position vehicle on a flat surface.
- Open the engine cover.
Step 2: Raise the rear of the vehicle if extra ground clearance is needed
- TIP: Some people can perform the oil change without raising the vehicle if they use a low profile drain pan.
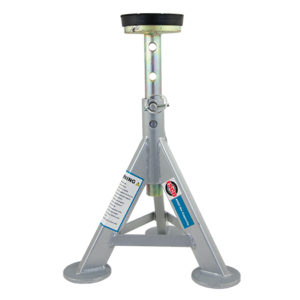
- However, if extra clearance is needed, raise the vehicle using either vehicle ramps or jack stands.
- Place wheel chocks in front of the front wheels to prevent the car from rolling.
- To lift your vehicle on jack stands, check out this helpful video from the YouTube channel CarFanatic.
Step 3: Gain access to the engine oil filter.
- Start by raising the rear spoiler. To do this, turn on the ignition, then press the spoiler button on the center console until it illuminates.
- Then, press and hold the spoiler button until the indicator goes away; this will put your spoiler up in service mode.
- Open engine deck lid and remove the plastic frame that sits at the top of flexible air intake tubing, as shown in the video.
- Next, remove the plastic engine cover that covers the two fans by carefully pulling up on each side; you will need to push the flexible air intake tube through the hole in the cover.
- Remove the passenger side fan by pulling it up and unclipping the wiring connector.
- Remove the air intake tubing by pulling up on it; be careful not to damage any surrounding wiring.
Step 4: Drain the engine oil.
- Unscrew the oil fill cap, which will help the engine oil drain more easily.
- Slide underneath the car from the rear and locate the oil drain plug as shown in the video.
- The drain plug is plastic and mates up to the car’s oil drain pan, which is also plastic.
- Position the large oil catch pan underneath the oil drain plug.
- With rubber gloves on, use the drain plug removal tool to turn the plug counterclockwise until it pops out.
- Let the oil drain for at least 15 minutes.
Step 5: Replace the engine oil filter.
- Place paper towels or rags around the oil filter housing and air intake in the engine bay.
- Remove the oil filter housing using a 36mm socket.
- Remove the oil filter cap gasket with a small flat head screwdriver; be careful not to scratch the cap.
- Slide the new gasket onto the housing and smear a small amount of oil over it to lubricate the seal.
- Remove the old oil filter and replace it with a new one; be sure the new oil filter sits correctly.
- Reinstall the oil filter cap and tighten it to 19 ft-lbs using a torque wrench.
Step 6: Re-install the oil drain plug.
- Install a new drain plug. Be sure to align the two tabs on the outer edge of the drain plug with the corresponding tabs on the oil pan.
- Turn the drain plug clockwise with the drain plug tool.
- Once the drain plug snaps into place, you’re done and don’t need to tighten it any further.
Step 7: Add new engine oil.
- Using a funnel, add only 7 liters of new oil to prevent overfilling.
- Ensure there are no engine oil leaks.
Step 8: Reinstall everything.
- Refit the intake tubing, fan and engine compartment cover.
- Lower your car back down. If you’re using vehicle ramps, you can just put your car in neutral and let it roll back down.
Step 9: Ensure the engine oil has been filled to the correct level.
- Start the engine and allow it to warm up.
- When the car is sufficiently warm, you can have your onboard computer measure the oil level by selecting “Oil” on your gauge cluster.
- The upper line of the digital oil level reading is the max. while the lower line is the minimum.
- The difference between the min and max lines is ~1.5 liters.
- Based on the reading, turn off your engine and add more oil as needed.
Step 10: Reset the vehicle's service indicator.
- To reset your service indicator, you will need a tool like the Foxwell NT510.
- Connect the diagnostic tool to the OBDII port and turn the ignition to the “ON” position.
- Go through the menus on the diagnostic tool.
- You should be able to select your vehicle and find an “oil lamp reset” functionality.
- To get a general sense of how such diagnostic tools work, check out the following video. While the iCarSoft POR II featured would work, we recommend the Foxwell because it has additional features like the ability to register a new battery to your vehicle.
Step 11: Collect all of your tools and clean up.
- Note: Engine oil is damaging to the environment. Take your oil engine oil to any local auto parts store to recycle it.



Tibi says:
Good day – was told by a PCA member that late model Porsche’s require C40 spec oil. I don’t believe the oil that’s described in this video meets that but is still A40 spec required for “classic” / older Porsches. C40 apparently designed to prevent predetonation. Any comments / feedback would be greatly appreciated.
ecarguidesllc says:
Hi Tibi. Thanks for the question. From some initial research, it appears that A40 is the spec oil for vehicles WITHOUT gas particulate filters (GPF) and C40 is for vehicles WITH GPF. Hope this helps.
John H says:
Thanks for helpful instructions and especially for links to tools and parts.
I followed these instructions (and Alex C video) step-by-step and successfully changed oil and filter on my 2017 Carrerra Cab (991.2). Everything went exactly as it should.
However, I never needed Torx screwdrivers (ref “Tools Required” list).
Maybe someone could explain when and why one would need Torx drivers? Maybe one of the other years or models?
Anyway, thanks again, very helpful. I saved $ vs. dealer service dept, even after buying tools I didn’t already have (ramps, torque wrench, trim tools, OBD2 scanner, 36mm socket).
John H says:
Oops! “Carrera”, not “Carrerra”.
Matt says:
Hi, my driveway is slopped so is it better to have the front or rear end at the lower elevation to ensure the most oil drains out?