Engine oil is vital to your car’s engine. It’s primary function is to protect internal moving parts by providing lubrication to reduce friction and metal on metal contact. Over time the oil loses its critical properties, so regular replacement of the oil and filter are essential to maintaining your vehicle’s engine.
Porsche recommends replacing your engine oil and filter every 10,000 miles or once a year, whatever comes first. However, we recommend a 5,000 miles or once per year interval to help extend the life of your vehicle’s engine. Replacing the engine oil is a simple job that doesn’t require many tools, making it suitable even for novice do-it-yourselfers.
Instead of paying over $300 for an oil change at a Porsche dealership, use our detailed DIY guide to learn how to change your own oil for less than $100. Before getting started, take a look at video from the YouTube channel, MT Paradise, to get an overview. Detailed step-by-step instructions along with tools, parts, and exact specifications can be found below.
- Mechanic’s Tool Set
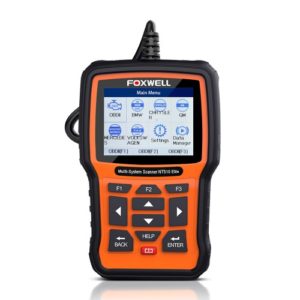
- Foxwell NT530 OBD2 Diagnostic Scanner (for Porsche) (optional tool for resetting service indicator)
- 74mm 14 Flute Oil Filter Socket
- 3/8 Inch Drive Click Torque Wrench (10-80 ft.-lb.)
- Metric Hex Bit Socket Set, 3mm to 10mm
- Oil Drain Pan, 16 Quarts Capacity
- Long Neck Fluid Funnel
- Low Profile Vehicle Ramps, 2.2 Ton Capacity, Pair
- Disposable Gloves
- Safety Glasses
Oil drain plug: 37 ft-lbs
Oil filter housing: 19 ft-lbs
Engine oil capacity: 7.9 quarts
Step 1: Step 1: Prepare your vehicle and work area.
- Warm up the engine by driving your car around for 5 minutes. This will help the oil flow more easily.
- Gather required tools and parts and put on gloves and eye protection.
- Position vehicle on a flat surface.
- Open the engine cover.
Step 2: Raise the rear of the vehicle.
- Drive the rear of your car on vehicle ramps to get extra clearance for working underneath it.
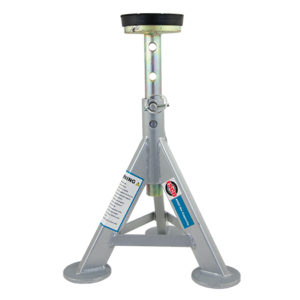
- Alternatively, you can use a jack and jack stands on the vehicle’s approved lifting points. Be sure to engage the parking brake.
- To lift your vehicle on jack stands, check out this helpful video from the YouTube channel CarFanatic.
- NEVER rely on a jack to support your vehicle!
Step 3: Drain the engine oil.
- Slide underneath the car and locate the oil drain plug.
- Using an 8mm hex socket and ratchet, loosen the drain plug. However, don’t remove the drain plug all the way.
- Position a large oil catch pan underneath the oil drain plug.
- Unscrew the drain plug and remove it quickly so it doesn’t fall into the oil catch pan.
- Let the oil drain for at least 15 minutes.
Step 4: Replace the engine oil filter.
- At the drivers side of the engine, above the oil pan, locate the oil filter housing.
- Using a 74mm oil filter socket, 12 inch extension and ratchet, remove the housing with filter and guide it out.
- Using a small flathead screwdriver, carefully remove the old rubber gasket on the oil filter housing. Be careful not to scratch the oil filter housing in the process.
- Slide the new gasket onto the housing and smear a small amount of oil over it to lubricate the seal.
- Place the engine oil filter into the housing and fill the housing half way with fresh oil.
- Install the new oil filter and torque the housing to 19 ft-lbs using a torque wrench.
Step 5: Add new engine oil.
- Reinstall the oil drain plug along with a new crush washer. Tighten the drain plug to 37 ft-lbs using a torque wrench
- Inside the trunk, locate and remove oil filler cap.
- Use a funnel and add 7.5 quarts of new oil.
- Check under the car to ensure there are no oil leaks.
Step 6: Re-install everything.
- Lower your car back down.
- If you’re using vehicle ramps, you can just put your car in neutral and let it roll back down.
Step 7: Ensure the engine oil has been filled to the correct level.
- Start engine and allow it to warm up.
- When the car is sufficiently warm, you can have your onboard computer measure the oil level by selecting “Oil” on your gauge cluster.
- The upper line of the digital oil level reading is the max. while the lower line is the minimum.
- The difference between the min and max lines is ~1.8 quarts.
- Based on the reading, turn off your engine and add more oil as needed.
Step 8: Reset the vehicle's service indicator.
- To reset your service indicator, you will need a tool like the Foxwell NT530.
- Connect the diagnostic tool to the OBDII port and turn the ignition to the “ON” position.
- Go through the menus on the diagnostic tool.
- You should be able to select your vehicle and find an “oil lamp reset” functionality.
- To get a general sense of how such diagnostic tools work, check out the following video. While the iCarSoft POR II featured would work, we recommend the Foxwell because it has additional features like the ability to register a new battery to your vehicle.
Step 9: Collect all of your tools and clean up.
- Engine oil is damaging to the environment.
- Take your oil engine oil to any local auto parts store to recycle it.
