Engine oil is vital to your car’s engine. It’s primary function is to protect internal moving parts by providing lubrication to reduce friction and metal on metal contact. Over time the oil loses its critical properties, so regular replacement of the oil and filter are essential to maintaining your vehicle’s engine.
For the 996, Porsche originally recommended changing the engine oil and filter every 15,000 miles. However, this is way too long if you want to get the most life out of your engine. We recommend replacing your engine oil every 5,000 miles or 1 year, whichever comes first. While it may be intimidating to work on your Porsche, changing the oil and filter isn’t much different than on other vehicles. This is a great entry-level maintenance procedure that you can perform yourself and save yourself money on year after year.
Instead of paying over $300 for a SIMPLE oil change at a Porsche dealership, use our detailed DIY guide to learn how to change your own oil for less than $100. To get an overview, check out the above tutorial video from Adam Coats. More detailed instructions can be found below.
- Mechanic’s Tool Set
- Metric Hex Bit Socket Set, 3mm to 10mm (for turbo housing drain plugs)
- 27mm Combination Wrench
- 3/8 Inch Drive Click Torque Wrench (10-80 ft.-lb.)
- Oil Drain Pan, 16 Quarts Capacity
- Low Profile Oil Drain Pans, Pair – 6 Quarts Capacity Each
- Low Profile Vehicle Ramps, 2.2 Ton Capacity, Pair
- Long Neck Fluid Funnel
- Disposable Gloves
- 76mm 14 Flute Oil Filter Socket
- Safety Glasses
- Mobil 1 0W-40 Full Synthetic Motor Oil, 5 Quart, Pack of 2 - P/N: 120760
- MAHLE Engine Oil Filter - P/N: OX 128/1D ECO
- Engine Oil Filler Pipe Gasket - P/N: 99970746540
- Aluminum Crush Washer Assortment Kit - P/N: B07G83MFDK (for oil pan and turbo housing drain plugs)
- Dry Sump Drain Plug Crush Washer - P/N: 90012301020
Oil Pan Drain Plug: 52 ft-lbs
Dry Sump Drain Plug: 44 ft-lbs
Turbo Housing Drain Plugs: 22 ft-lbs
Oil Filter Cover: 19 ft-lbs
Engine Oil Change Capacity: 8.7 liters
Step 1: Prepare your vehicle and work area
- Warm up the engine by driving your car around for 5 minutes. This will help the oil flow more easily.
- Gather required tools and parts and put on gloves and eye protection.
- Position vehicle on a flat surface.
- Open the engine cover.
Step 2: Raise the rear of the vehicle
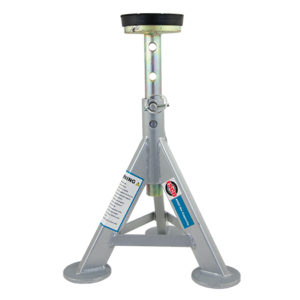
- Raise the vehicle using either vehicle ramps or jack stands.
- Place wheel chocks in front of the front wheels to prevent the car from rolling.
- To lift your vehicle on jack stands, check out this helpful video from the YouTube channel CarFanatic; while the video is for a 997, the procedure is the same on the 996.
Step 3: Drain the main oil pan
- The 996 Turbo has 4 separate drain plugs you will have to drain.
- Start by draining the oil pan.
- Use a 15mm socket to break the drain plug loose, but do not fully remove it.
- Place a large oil drain pan that can hold at least 9 liters of oil underneath the drain plug, then remove the drain plug.
- Be sure to catch the drain plug before it falls into the drain pan.
- Allow the oil to drain for 15 minutes.
Step 4: Drain the turbo housings
- While the oil pan is draining, move onto draining the turbo housings which are located on the driver and passenger sides.
- Starting with one side, use a 8mm hex bit socket to break the drain plug loose, but do not fully remove it.
- Place the oil drain pan underneath the drain plug, then remove the drain plug. Be sure to catch the drain plug before it falls into the drain pan.
- Repeat this procedure for the other turbo housing.
- For the turbo housings, just allow the oil to drain until it is barely dribbling out.
Step 5: Drain the dry sump
- While the main oil pan is draining, move onto the dry sump.
- You will need to use a 19mm socket to remove the dry sump drain plug.
- However, the drain plug screws into a bung which you will need to hold in place using a 27mm wrench.
- Break the 19mm drain plug loose as you apply counter pressure to the 27mm wrench to prevent the bung from rotating.
- Place the oil drain pan underneath the drain plug, then remove the drain plug. Be sure to catch the drain plug before it falls into the drain pan.
- Allow the oil to drain until it is barely dribbling out.
Step 6: Replace the engine oil filter
- The engine oil filter is located under the engine cover.
- While the oil is draining, use a 76mm 14 flute oil filter socket and ratchet to remove the oil filter cap which is located just ahead of the oil pan and toward the passenger side.
- Use a small flat head screwdriver to replace the large o-ring seal on the oil filter cap with a new one, which should be included with the new oil filter.
- Also replace the small o-ring on the engine oil filler pipe.
- Dab some new engine oil around the o-rings to help create a leak-free seal.
- Place the new oil filter into the engine oil filter housing.
- Re-install the oil filter cap and torque to 19 ft-lbs.
Step 7: Reinstall the oil drain plugs
- Place new crush washers on the drain plugs and reinstall them by hand.
- The drain plugs for the oil pan and turbo housings use aluminum crush washers.
- The drain plug for the dry sump uses a copper washer.
- Use a torque wrench to tighten the drain plugs to the following torque specs:
- Oil Pan Drain Plug (15mm bolt): 52 ft-lbs
- Dry Sump Drain Plug (19mm bolt): 44 ft-lbs
- Turbo Housing Drain Plugs (8mm hex bit): 22 ft-lbs
Step 8: Add new engine oil
- To prevent from overfilling your engine oil, start by adding 8 liters.
- Ensure there are no engine oil leaks.
- If you raised your vehicle, lower it back down so it sits level.
Step 9: Ensure the oil is filled to the correct level
- As shown in the video, you can use your onboard computer to measure the engine oil level.
- Start engine and allow it to warm up.
- When the car is sufficiently warm, you can have your onboard computer measure the oil level by selecting “Oil” on your gauge cluster.
- The upper line of the digital oil level reading is the max.
- The lower line of the digital oil level reading is the minimum.
- Each increment represents a little less than 0.42 quarts.
- Based on the reading, turn off your engine and add more oil as needed.
Step 10: Collect all of your tools and clean up
- Engine oil is damaging to the environment.
- Take your used engine oil to any local auto parts store to recycle it.
