Changing your rear differential oil is important to keep your drivetrain smooth. Over time, the oil loses its critical properties that prevent metal on metal contact. This is a easy do-it-yourself as long as you have the proper tools and ability to get your vehicle off the ground safely. If you are unsure of how to do this procedure, please visit a certified mechanic.
For an overview of the procedure, check out the above DIY from the YouTube channel, dslamitz. While the video is for a Porsche 996 C4S, it also applies to other 996 trims with 3.6L engines. Detailed steps, parts, and tools required can be found below.
- Mechanic’s Tool Set
- Metric Hex Bit Socket Set, 3mm to 10mm
- 1/2 Inch Drive Click Torque Wrench (25-250 ft.-lb.)
- Socket Adapter & Reducer Set
- K Tool International Low Profile Jack (3.33 Ton)
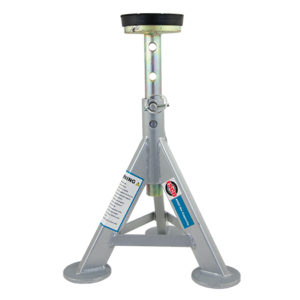
- ESCO 10499 Low Profile Flat Top Jack Stands (Pair) (4 required)
- Wheel Chocks
- Oil Drain Pan, 6 Quarts Capacity
- Fluid Transfer Pump Kit
- Disposable Gloves
- Safety Glasses
Tiptronic rear differential fluid capacity: 1.2 liters
Differential fill plug (8mm hex bit): 16 ft-lbs
Differential drain plug (14mm hex bit): 19 ft-lbs
Step 1: Prepare your vehicle and work area
- Starting with a cold engine, drive your car lightly for 5 minutes to get the drivetrain fluid warmed up; this will make it easier to drain the differential fluid.
- Park your car on a flat surface.
- Gather required tools and parts.
- Put on gloves and eye protection.
Step 2: Raise your vehicle off the ground
- To give yourself enough clearance to work, safely raise your vehicle using a lift or jack and jack stands.
- ENSURE YOUR CAR IS LEVEL! This is essential to ensure the correct fluid level.
- NEVER rely on a jack to keep your car up; use jack stands to safely support your vehicle.
- Also be sure to use wheel chocks to prevent your car from rolling.
- To lift your vehicle on jack stands, check out this helpful video from CarFanatic.
- While it is for the Porsche 997, the procedure for the 996 is the same.
- Once your car is on jack stands, give your car a hard shove to make sure it is secure.
Step 3: Remove the rear differential fill plug
- Locate the rear differential, which is the big round housing located in front of the oil pan towards the front of the vehicle.
- Then locate the differential fill plug which is the driver’s side of the differential.
- Use an 8mm hex bit socket to remove the differential fill plug.
- If you cannot remove the fill plug, STOP AND DO NOT PROCEED as you will not be able to add new oil.
Step 4: Drain the rear differential oil
- Locate the drain plug on the bottom of the differential and break it loose with a 14mm hex bit socket.
- Position an oil catch pan underneath the differential and remove the oil drain plug. Make sure to catch it before it falls into the oil catch pan.
- Let the oil drain for at least 15 minutes.
- Reinstall the drain plug along with a NEW sealing ring (see parts section) and torque it to 19 ft-lbs with a torque wrench.
Step 5: Fill the rear differential with new gear oil
- Note: Before filling the differential, make sure the vehicle is level so you can fill the oil to the correct level.
- Add ~1.2 liters of transmission fluid in the fill bolt hole using a fluid transfer pump as showing in this video from BleeingJeep.
- Once oil begins to drip out of the fill hole, stop adding oil.
Step 6: Ensure the differential is filled to the correct level
- Start the car and shift the gearbox lever through the R-N-D while pausing for one second at each position.
- Put the gear lever into Park.
- Go back underneath the car and add more oil until it starts spills out.
- Remove the pump hose and wipe off any oil residue.
- Refit the fill plug along with a new crush washer and tighten it to 16 ft-lbs with a torque wrench.
- Ensure there are no leaks.
Step 7: Lower your vehicle back on the ground
- Lower your vehicle back on the ground.
- Clean up your work area and put away your tools.
- Save the used oil in a container, so you can recycle it at your local auto parts store.


Andy says:
i have a 2002 996 Carrera C2, would anyone know if a seal is necessary for the drain plug? I have read that only the fill plug needs a seal, but that didn’t some correct. Also, are the seals the same size for both if needed?
ecarguidesllc says:
Hi Andy. The exact seal for the drain plug is very elusive to track down. The link for the fill plug seal is actually for an assortment kit, which may include a washer that fits the drain plug. However, it looks like you’ll have to remove the drain plug to confirm. Worst case, you can probably get away reusing the existing drain plug and seal. Hope this helps!
Andy says:
Thank you very much. I appreciate the information.