Changing your rear final drive oil is important to keep your drivetrain smooth. Over time, the oil loses its critical properties that prevent metal on metal contact. This is a easy do-it-yourself as long as you have the proper tools and ability to get your vehicle off the ground safely. If you are unsure of how to do this procedure, please visit a certified mechanic.
While Porsche recommends owners change the rear final drive oil every 16 years or 160,000 miles, we believe this is too long. This is a cheap and easy do-it-yourself as long as you have the proper tools and ability to get your vehicle off the ground safely. To get a sense of the general procedure, check out the above DIY from the YouTube channel, DIY Dan. While the vehicle in the video is a Porsche Cayenne, the procedure is very similar on the Macan. Detailed steps, parts, and tools required can be found below.
- Mechanic’s Tool Set
- Fluid Transfer Pump Kit
- Oil Drain Pan, 16 Quarts Capacity
- K Tool International Low Profile Jack (3.33 Ton)
- Slotted Polyurethane Jack Pad (1 required)
- ESCO 10498 Performance Jack Stands (Pair) (4 required)
- Wheel Chocks
- Metric Hex Bit Socket Set, 3mm to 10mm
- 3/8 Inch Drive Click Torque Wrench (10-80 ft.-lb.)
- Safety Glasses
- Disposable Gloves
Oil drain plug: 30 ft-lbs
Oil fill plug: 30 ft-lbs
Rear final drive (no lock) oil capacity: 1.2 liters
Rear final drive (with lock) oil capacity: 1.45 liters
Step 1: Prepare your vehicle and work area
- Starting with a cold engine, drive your car lightly for 5 minutes to get the drivetrain fluid warmed up; this will make it easier to drain the final drive oil.
- Park your car on a flat surface.
- Gather required tools and parts.
- Put on gloves and eye protection.
Step 2: Raise your vehicle to give yourself extra clearance
- If you have air suspension, simply raise your car to the highest ride height.
- If not, raise your vehicle with a lift or jack stands; it is very important your car is level during the procedure.
- If using a jack and jack stands, be sure to engage parking brake and use wheel chocks to prevent your car from rolling. Give your vehicle a strong shove once it is on jack stands to make sure your vehicle is properly secured.
- NEVER rely on a jack to support your vehicle.
- Note: If you have air suspension and decided to jack up the car, you will need to lock the air suspension by starting the car and holding low suspension setting button for 10 seconds. You will see an indicator pop up on your gauge cluster.
Step 3: Remove the rear final drive fill bolt
- Place all necessary tools, oil pan and gloves within your reach while working under the car.
- Slide underneath the car from the rear and locate the rear final drive (aka “differential”).
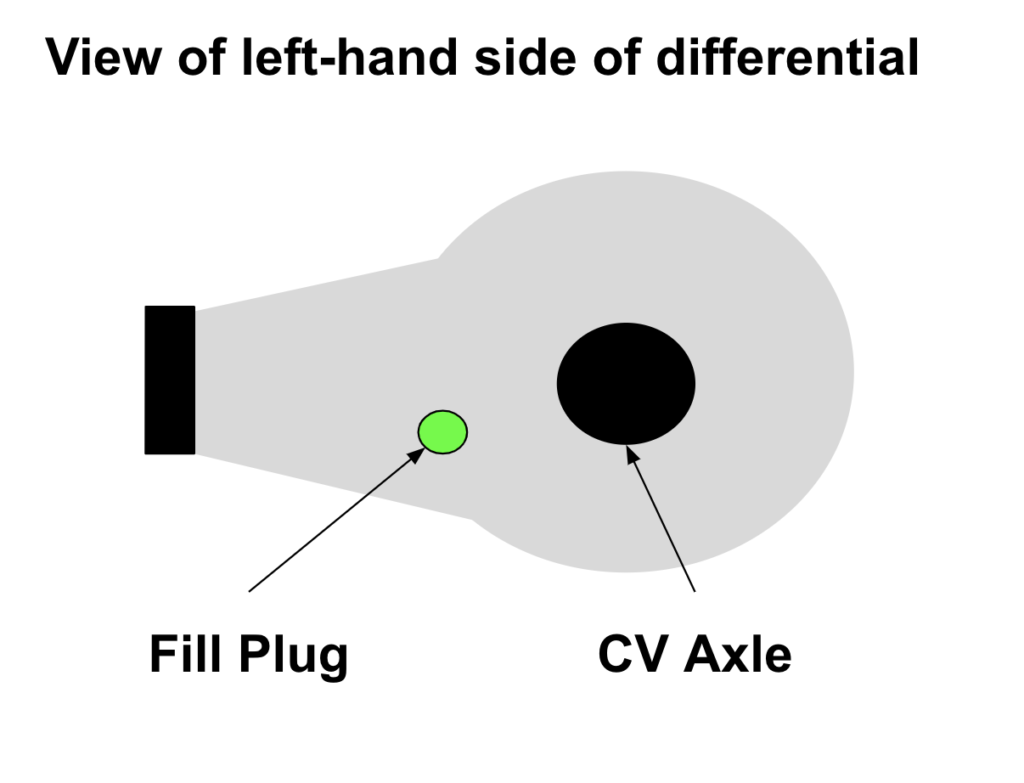
- On the left-hand side of the final drive housing and just in front of the CV axle, locate the oil fill plug.
- At the drivers side of the final drive housing, just in front of the CV axle, locate an oil fill plug.
- Use a ratchet, appropriate length extension, and a 10mm hex bit to break loose and remove the fill plug.
- If you cannot remove the fill plug, STOP AND DO NOT PROCEED; you will not be able to fill your rear final drive with oil.
Step 4: Drain the rear final drive oil
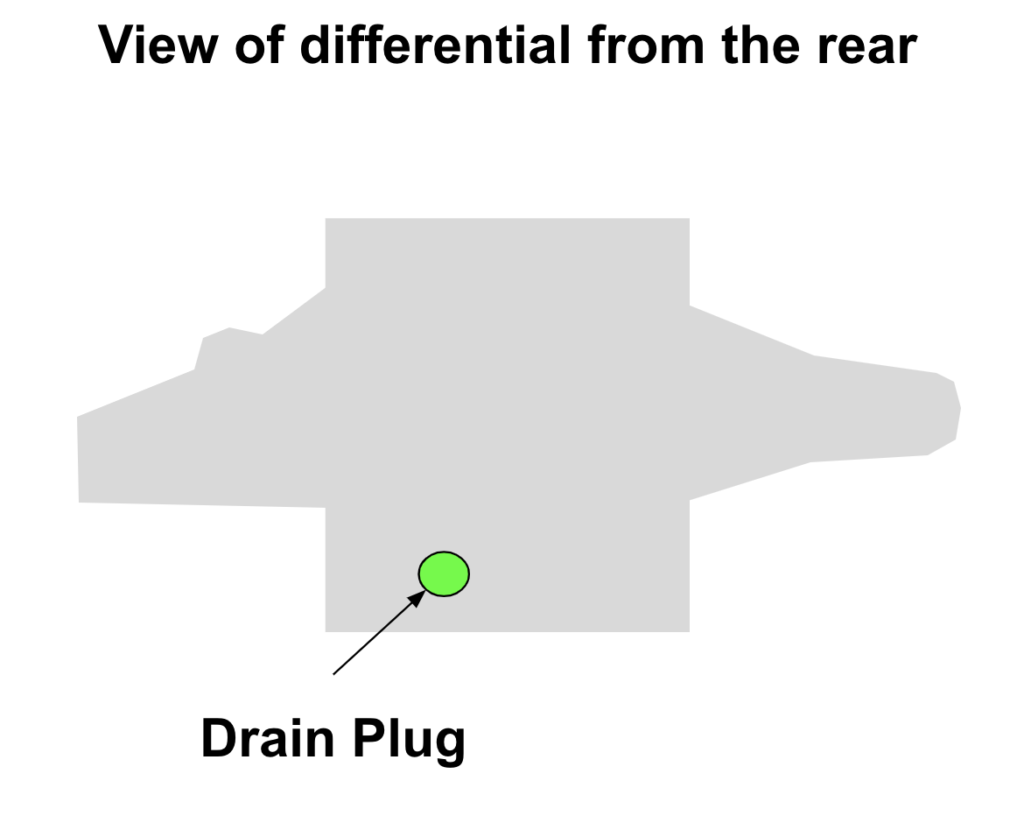
- On the side of the final drive housing facing the rear of the vehicle, locate the oil drain plug.
- Break it loose oil drain plug loose using a ratchet and 10mm hex bit socket, but do not fully remove the drain plug.
- Position an oil drain pan underneath the oil drain plug; remove the oil drain plug and be sure to catch it before it falls into the drain pan.
- Let the oil drain for at least 15 minutes and then refit the drain plug and torque it to 30 ft-lbs using a torque wrench.
Step 5: Fill the all-wheel final drive with new oil
- Add ~1.2 liters (or ~1.45 liters if you have a rear locking final drive) of oil via the fill port using a fluid pump as shown in this video from BleeinJeep.
- As long as your car is level, you’ve reached capacity once the oil starts to drip out of the fill hole.
- Install the fill bolt and torque it to 30 ft-lbs.
- Ensure there are no fluid leaks.
Step 6: Clean up your work area
- Store the old gear oil in a plastic container, so you can take it to your nearest auto parts store to recycle.
- Clean up your workspace and put all of your tools and supplies away.
- You’re all done!


