Despite being relatively simple, spark plugs play a significant role in any gasoline engine. Their function is to produce a spark at the required time that ignites the air and fuel mixture. All spark plugs, being exposed to extreme pressures and temperatures that occur during engine operation, wear out with time. This can cause poor engine performance, misfire and drop in fuel economy. Also, a worn spark plug can have a larger electrode gap, which requires higher voltage and can lead to premature ignition coil failure.
While replacing spark plugs on normal cars is a pretty simple task, it is more difficult on the Porsche 911 due to the engine’s horizontally opposed design and placement. We recommend you have some experience working on cars before performing this DIY. For an overview of the procedure, check out the video above from YouTube channel, Pawinning. If you would like to do-it-yourself, you can find the parts, tools, and instructions below.
- Mechanic’s Tool Set
- K Tool International Low Profile Jack (3.33 Ton) (2 required)
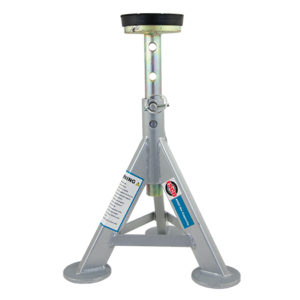
- ESCO 10499 Low Profile Flat Top Jack Stands (Pair) (2 required)
- Wheel Chocks
- 1/2-Inch Drive 19MM Non-Marring Lug Nut Socket
- Wheel Bolt Guide For Porsche, Audi, and VW (2 recommended)
- 1/2″ Drive Extension Breaker Bar
- 1/2 Inch Drive Click Torque Wrench (25-250 ft.-lb.)
- 3/8 Inch Drive Extension Set
- 3/8 Inch Drive Click Torque Wrench (10-80 ft.-lb.)
- 5/8 Inch Magnetic Spark Plug Socket
- 3/8 Inch Drive Universal Joint
- Metric Hex Bit Socket Set, 3mm to 10mm
- Magnetic Torx Screwdrivers Set, T5 to T40
- External Torx Socket Set, E4 to E24 (needed if your vehicle has revised ignition coils)
- Disposable Gloves
- Safety Glasses
Spark plugs: 22 ft-lbs
Ignition coil screws: 7.5 ft-lbs
Heat shield screws: 7.5 ft-lbs
Wheel bolts: 118 ft-lbs
Step 1: Prepare your vehicle and work area
- Ensure that your engine is cool so you don’t burn yourself and your car is parked on a flat surface.
- Gather your parts and tools and wear gloves and safety glasses.
Step 2: Raise the rear of the vehicle
- To give yourself enough clearance to work, safely raise your vehicle using a lift or jack and jack stands; ensure your car is level.
- If using jack stands, you just need to raise the rear of the vehicle.
- NEVER rely on a jack to keep your car up; use jack stands to safely support your vehicle.
- Also be sure to use wheel chocks to prevent your car from rolling.
- Once your car is on jack stands, give your car a hard shove to make sure it is secure.
- To lift your vehicle on jack stands, check out this helpful video from the YouTube channel CarFanatic. While the video is for a 997, the procedure is the same on the 996.
Step 3: Remove the rear wheels
- With the parking brake engaged, use a 19 mm lug nut socket and breaker bar to loosen the wheel bolts.
- To prevent damaging your wheels during removal and reinstallation, you can use wheel guide bolts to help slide the wheels off and help you remove your rear wheels without damaging your wheels.
- As an added safety precaution, place a wheel under your vehicle’s engine block.
Step 4: Remove the rear bumper and tail lights
- To replace the spark plugs and ignition coils, you will have to remove the rear bumper. Here’s an overview video from Clint Hightower.
- Start by placing an old blanket or towels below the rear bumper, so you can set down the bumper without scratching it; it’s also helpful to have a second set of hands for this step.
- Start by removing the bumper guards around the license plate; each bumper guard is held on by a single 6mm hex bit bolt which you can reach by removing the plastic cap and using a ratchet with a long extension.
- Remove the screws along the bottom edges of the bumper.
- On each side, there are 2 T27 screws
- Along the center, there are 4 Phillips screws
- Next, on each side where the bumper meets the wheel arch, remove the Phillips screw that can be accessed through the fender liner.
- Open the engine cover and remove the 4 Phillips screws on the top edge of the bumper between the tail lights.
- If your car has sensors in the bumper, remove the tail lights which are each held on by 2 Phillips screws.
- Begin removing the bumper cover and disconnect any attached wire connectors.
- Place your bumper down gently and in a safe spot to avoid scratching it.
Step 5: Remove the rearward fender liners, intercoolers, and exhaust heat shield
- To gain access to the spark plugs, you will also have to remove the intercoolers.
- Remove the rearward fender liners, which are held by T27 screws and a 6mm hex bolt.
- On each intercooler, undo the top and bottom hose clamps, then remove the 13mm nuts and bolts holding the intercooler and bracket in place.
- Remove the intercoolers.
- With the intercoolers off, remove the exhaust heat shields which are each held in place with two 10mm bolts.
Step 6: Starting on one side of the engine, remove the spark plug heat shield
- Remove the heat shield that covers the ignition coils and spark plugs.
- Each heat shield is secured by two bolts, which can be removed using an 10 mm socket and ratchet.
Step 7: Remove the ignition coils
- Start by removing the ignition coil connectors.
- Depress the plastic tab on the connector, then wiggle the connector off; if you have a hard time getting the connector off, use a flat head screwdriver to gently work the connector loose.
- Remove the bolts that hold on each ignition coil using a ratchet and 5mm hex bit socket; note: some vehicles used revised bolts, which require an E-Torx socket.
- Work each ignition coil out.
- Inspect the ignition coils for cracks. If you see any, it is a good idea to replace them all.
Step 8: Replace the spark plugs with new ones
- Remove the spark plugs using a magnetic spark plug socket (linked in parts section), appropriate length extension, and ratchet or breaker bar.
- It may be helpful to use a universal joint or a swivel magnetic spark plug socket to gain access to each of the spark plugs.
- Insert the new spark plug into your spark plug wrench and remove the cardboard covering the electrode tip; do not touch the tip.
- Even though the new spark plugs are pre-gapped, it’s a good idea to inspect them in case any got damaged.
- Insert the new spark plug into the spark plug tube and hand tighten to prevent cross threading. Once the plug is threaded in all the way by hand, torque it to 22 ft-lbs.
Step 9: Reinstall the ignition coils and heat shield
- Insert the ignition coils back into the spark plug holes by rotating it back and forth slightly to help get it seated properly. Torque the ignition coil bolts to 7.5 ft-lbs or just tighten them snug by hand.
- Connect the wiring harness connectors to the ignition coils and make sure it clicks in securely.
- Reinstall the heat shield and torque the screws to 7.5 ft-lbs or just tighten them snug by hand.
- Note: If you are replacing your ignition coils, it’s important to note that Porsche used one coil pack design before switching to a thicker coil pack. If you are replacing your ignition coils with the new design, you will also need to purchase longer ignition coil bolts (see parts section).
Step 10: Repeat the prior steps on the other side of the engine
Step 11: Reinstall everything and lower your car
- Reinstall the exhaust heat shields, intercoolers, rearward wheel liners, bumper, and rear tail lights; just hand-tighten the fasteners.
- Reinstall the wheels and tighten the wheels in a criss-cross pattern to 118 ft-lbs.
- Lower your vehicle using the reverse steps you used to raise the vehicle.
- Remember to remove the wheel chocks.
- Clean up your work area and you’re all done!
