Despite being relatively simple, spark plugs play a significant role in any gasoline engine. Their function is to produce a spark at the required time that ignites the air and fuel mixture. All spark plugs, being exposed to extreme pressures and temperatures that occur during engine operation, wear out with time. This can cause poor engine performance, misfire and drop in fuel economy. Also, a worn spark plug can have a larger electrode gap, which requires higher voltage and can lead to premature ignition coil failure.
While changing the spark plugs on most cars is pretty straight forward, it’s definitely more complicated on the Porsche 991.2 turbo models. We recommend you have experience working on cars before attempting this DIY. To get an overview of the procedure, check out this video from the YouTube channel, Obsessed Garage. While the video covers the 991.1 GT3, the process is similar on the 991.2 models; there are turbocharger inlet tubes you will need to remove to gain access to the spark plugs; a big thank you to VektorPerformance for allowing us to use his photos below. Detailed step-by-step instructions, along with the parts and tools you’ll need, can be found below.
- Mechanic’s Tool Set
- K Tool International Low Profile Jack (3.33 Ton) (2 jacks required)
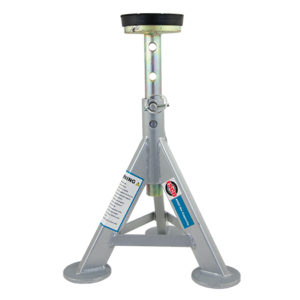
- ESCO 10499 Low Profile Flat Top Jack Stands (Pair) (2 Required)
- Wheel Chocks
- 1/2-Inch Drive 19MM Non-Marring Lug Nut Socket
- Wheel Bolt Guide For Porsche, Audi, and VW (2 Recommended)
- 1/2″ Drive Extension Breaker Bar
- 1/2 Inch Drive Click Torque Wrench (25-250 ft.-lb.) (For Wheels)
- 3/8 Inch Drive Extension Set
- 3/8 Inch Drive Click Torque Wrench (10-80 ft.-lb.)
- 14MM 12 Point Magnetic Spark Plug Socket, 3/8 Inch Drive
- 3/8 Inch Drive Universal Joint
- Magnetic Torx Screwdrivers Set, T5 to T40
- External Torx Socket Set, E4 to E24
- Disposable Gloves
- Safety Glasses
Spark plug: 22 ft-lbs
Ignition coil fastening bolt: 8 ft-lbs
Heat shield bolt: 10 ft-lbs
Wheel bolts: 118 ft-lbs
Step 1: Prepare your vehicle and work area
- Since you’ll be working on the engine, perform the spark plug replacement with a cold engine to eliminate the risk of burns.
- Additionally, you do not want to remove or install spark plugs when the engine is hot or you can damage the spark plug threads in the engine.
- Park your vehicle on a flat solid surface.
- Put on eye protection and gloves.
- Gather the required parts and tools.
Step 2: Raise the rear of the vehicle.
- While the car is still on the ground, use a 19mm lug nut socket and breaker bar to just break loose the wheel bolts on each of the rear wheels. Don’t unscrew the wheel bolts.
- Choke front wheels to prevent the car from rolling forward.
- Locate the lifting points underneath the vehicle along the side skirts; on each side, there is a lifting point behind the front wheel and another in front of the rear wheel.
- To get one of the rear corners on a jack stand, start by lifting that side of the vehicle using the FRONT lifting point; this will also raise the rear of the vehicle.
- Once the rear of the vehicle is high enough, slide your jack stand along with the jack pad under the REAR jack point.
- Lower your vehicle so it rests on the jack stand.
- Repeat on the other side.
- Once the rear end is on jack stands, give your car a hard shove to ensure it’s stable.
Step 3: Remove the rear wheels.
- Remove the wheel bolts holding the rear wheels using a 19mm socket and breaker bar.
- To help with the wheel removal and reinstallation, we recommend you use two wheel bolt guides per wheel.
Step 4: Gain access to the spark plugs on the left-hand side of the vehicle.
- Slide underneath the car from the rear on the left-hand side and find the heat shield that covers the ignition coils.
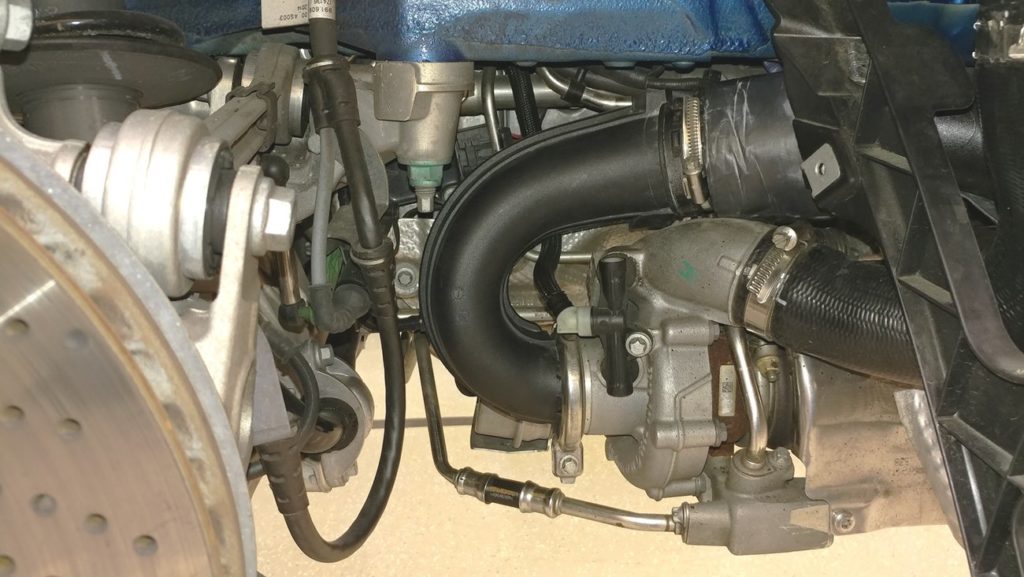
- As shown in the photo (courtesy of VektorPerformance), remove the U-shaped air hose that goes from the turbo obstructs by loosening both clamps.
- Locate and remove two E10 bolts that hold the shield in place and maneuver the shield out of the way.
- For each ignition coil, locate and remove the wiring connector at the top of the ignition coil by pressing down on the plastic tab and lifting the connector off.
- Remove T30 screws that secure the ignition coils.
- Remove each ignition coil, which will require some wiggling and twisting.
- Inspect your ignition coils for cracks; if any are cracked, should replace all of your ignition coils.
Step 5: Replace the spark plugs on the left-hand side of the vehicle.
- Because of the limited access, use a spark plug socket with a suitable length extension and universal joint to remove the old spark plugs.
- When removed from the engine, visually inspect each spark plug for contaminants and deposits, as shown in the video from Dennis Kirk, Inc. The condition of spark plugs can reveal a lot about the engine condition.
- Take extreme caution when installing the new spark plugs to avoid cross threading.
- Start by threading in the new spark plugs by hand using the spark plug socket and extension.
- Once the spark plugs are fully tightened by hand, use a PROPERLY CALIBRATED torque wrench to tighten each spark plug to 22 ft-lbs.
- If it feels like you’re over tightening the spark plug, stop before you strip the threads on the engine.
Step 6: Re-install everything on the left-hand side of the vehicle.
- Insert the ignition coils onto the spark plugs; you will need to use some force.
- Once the ignition coils are properly seated, torque the T30 screws to 8 ft-lbs or just hand tighten them until their snug.
- Reconnect the wiring connectors to the ignition coils.
- Re-install the heat shield and torque the E10 bolts to 10 ft-lbs or just hand tighten them until their snug.
- Reinstall the U-shaped air hose.
- Be careful not to over-torque any of these fasteners.
Step 7: Repeat the prior steps on the right-hand side of the vehicle.
Picture of turbo inlet pipe courtesy of VektorPerformance.

Step 8: Re-install your wheels and lower your vehicle.
- Re-install your wheels and torque the wheel bolts to 118 ft-lbs; be sure to tighten the wheel bolts in a star pattern to ensure the wheels sit flush to the hubs.
- Lower each side of the vehicle by lifting from the front jack point, removing the jack stand, then lowering that side of the vehicle.
- Put up your tools and clean up.
- You’re all done!





Daniel Krstovski says:
Thanks
james says:
Wheel torque for black bolts is 118 ft/lbs
Matt says:
Hi, good stuff, thanks. Is this process more or less the same on a 992 Sport?
ecarguidesllc says:
More or less, but I’m sure the 992 will have more things to remove to get to the spark plugs.