Despite being relatively simple, spark plugs play a significant role in any gasoline engine. Their function is to produce a spark at the required time that ignites the air and fuel mixture. All spark plugs, being exposed to extreme pressures and temperatures that occur during engine operation, wear out with time. This can cause poor engine performance, misfire and drop in fuel economy. Also, a worn spark plug can have a larger electrode gap, which requires higher voltage and can lead to premature ignition coil failure.
While changing the spark plugs on your Porsche Boxster or Cayman, it is actually quite easy once you remove the rear wheels. And you can save quite a lot of money doing it yourself. To get an overview of the procedure, check out this video from the YouTube channel, SummitLife. Detailed step-by-step instructions, along with the parts and tools you’ll need, can be found below.
- Mechanic’s Tool Set
- 5/8 Inch Magnetic Spark Plug Socket
- 3/8 Inch Drive Extension Set
- 3/8 Inch Drive Universal Joint
- Torx Bit Socket Set, T10-T60
- 1/2″ Drive Extension Breaker Bar
- 1/2-Inch Drive 19MM Non-Marring Lug Nut Socket
- 1/2 Inch Drive Click Torque Wrench (25-250 ft.-lb.)
- 3/8 Inch Drive Click Torque Wrench (10-80 ft.-lb.)
- K Tool International Low Profile Jack (3.33 Ton)
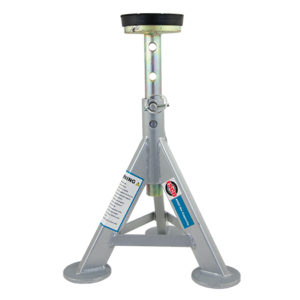
- ESCO 10499 Low Profile Flat Top Jack Stands (Pair) (2 required)
- Wheel Chocks
- Wheel Bolt Guide For Porsche, Audi, and VW (2 recommended)
- Disposable Gloves
- Safety Glasses
Spark plug: 22 ft-lbs
Ignition coil screws: 8 ft-lbs
Wheel bolts: 118 ft-lbs
Step 1: Prepare your vehicle and work area
- Ensure that your engine is cool so you don’t burn yourself and your car is parked on a flat surface.
- Gather your parts and tools and wear gloves and safety glasses.
Step 2: Raise the rear of the vehicle off the ground
- To give yourself enough clearance to work, safely raise your vehicle using a lift or jack and jack stands; ensure your car is level.
- If using jack stands, you just need to raise the rear of the vehicle as shown in this video.
- NEVER rely on a jack to keep your car up; use jack stands to safely support your vehicle.
- Also be sure to use wheel chocks to prevent your car from rolling.
- Once your car is on jack stands, give your car a hard shove to make sure it is secure.
Step 3: Remove the rear wheels
- Use a 19 mm lug nut socket and breaker bar to loosen the wheel bolts.
- To prevent damaging your wheels during removal and reinstallation, you can use wheel guide bolts to help slide the wheels off and help you remove your rear wheels without damaging your wheels.
- As an added safety precaution, place a wheel under your vehicle under the engine block.
Step 4: Gain access to the igniton coils
- Start by removing the small plastic piece covering the ignition coils; it is held on by T25 torx screws and 10mm nuts.
- Remove the rear fender liner, which is also held on by T25 torx screws and a 10mm nut.
- Locate the ignition coils and remove the wiring connectors; pull back the rubber covers, then press down on the plastic tab and pull the connector off.
- Remove the T40 torx screws on each ignition coil and pull out the ignition coils.
- Inspect the ignition coils; if any are cracked, all of your ignition coils should be replaced.
Step 5: Replace the spark plugs
- IMPORTANT: Never remove or install spark plugs on a hot engine or you can damage the spark plug threads.
- Combine a spark plug socket with suitable extensions and a universal joint to remove the old spark plugs.
- To learn about how your engine is running, you can visually inspect each spark plug for contaminants and deposits as shown in this video from Dennis Kirk, Inc.
- Insert the new spark plug into your spark plug socket and remove the cardboard covering the electrode tip; do not touch the tip.
- Insert the new spark plug into the spark plug tube and hand tighten to prevent cross threading. Once the plug is threaded in all the way by hand, torque it to 22 ft-lbs.
Step 6: Reinstall the ignition coils
- Insert the ignition coils and tighten the screws to 8 ft-lbs or just snuggly by hand.
- Reconnect the wiring connectors.
Step 7: Repeat the prior steps on the other side of the engine
Step 8: Reinstall everything and lower the vehicle back onto the ground.
- Reinstall the wheel liners.
- Reinstall your wheels; be sure to tighten your wheels in a star pattern and torque your wheel bolts to 118 ft-lbs.
- Lower your vehicle off the jack stands and remove the wheel chocks.
- Clean up your work area and you’re all done!
