It’s important to change the PDK transmission oil to keep your drivetrain running smoothly. Over time, the oil begins to breakdown so regular replacement is essential. The PDK transmission is a combination of a manual and automatic transmission. As a result, the transmission uses both manual transmission oil and automatic transmission fluid (ATF). This is a source of confusion for many Porsche owners because Porsche calls for both a “PDK transmission oil change” and a “PDK clutch oil change”. This article covers the PDK clutch oil, which uses special ATF.
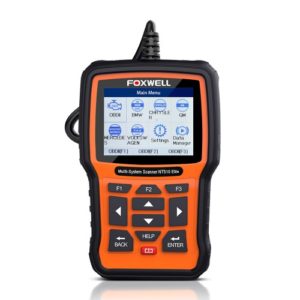
Changing the clutch oil is not a complicated job, but requires a special Porsche tool (PIWIS) to activate ‘Transmission fill mode’. This allows you to drain as much of the clutch oil as possible and achieve the correct oil level. However, you can still do-it-yourself by using a pyrometer or other diagnostic tool instead.
We also recommend changing out the PDK transmission filter and oil at the same time. This will save you time and money since changing the filter and oil only add a little bit more time. If you are inexperience doing your own maintenance and repairs, we recommend you go with a certified Porsche mechanic for the job.
For an overview of the fill procedure, check out the video from Jeff Richardson. While the video is for a 981, the process is nearly identical for the 987. Detailed step-by-step instructions along with tools, parts, and exact specifications can be found below.
- Mechanic’s Tool Set
- Etekcity Lasergrip 774 Digital Infrared Thermometer
- Metric Hex Bit Socket Set, 3mm to 10mm
- Torx Bit Socket Set, T10-T60
- 3/8 Inch Drive Click Torque Wrench (10-80 ft.-lb.)
- 1/4 Inch Drive Click Torque Wrench (20-200 in.-lb.)
- K Tool International Low Profile Jack (3.33 Ton)
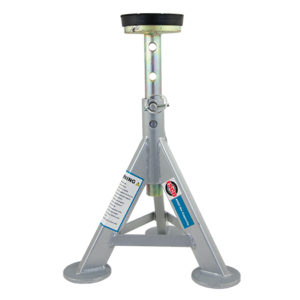
- ESCO 10499 Low Profile Flat Top Jack Stands (Pair) (4 required)
- Wheel Chocks
- Oil Drain Pan, 16 Quarts Capacity
- Fluid Transfer Pump Kit
- Disposable Gloves
- Safety Glasses
PDK transmission clutch oil capacity: 5.2 liters
PDK clutch oil drain plug: 11 ft-lbs
PDK clutch oil fill plug: 20 ft-lbs
Step 1: Prepare your vehicle and work area.
- Start with a cold engine, so you can fill your PDK clutch oil to the correct level.
- Put on eye protection and gloves.
- Park your car on a level surface.
- Gather parts and tools.
Step 2: Raise your vehicle off the ground
- To give yourself enough clearance to work, safely raise your vehicle using a lift or jack and jack stands.
- ENSURE YOUR CAR IS LEVEL! This is essential to ensure the correct fluid level.
- NEVER rely on a jack to keep your car up; use jack stands to safely support your vehicle.
- Also be sure to use wheel chocks to prevent your car from rolling.
- To lift your vehicle on jack stands, check out this helpful video from CarFanatic.
- While it is for the Porsche 997, the procedure is nearly the same except for jacking the rear.
- To get the rear on jack stands, jack the rear where the sway bar mounts to the chassis. Be sure to use a jack pad to prevent damage.
- Once your car is on jack stands, give your car a hard shove to make sure it is secure.
Step 3: Remove the PDK clutch oil fill bolt
- As shown in the video, locate the PDK clutch oil fill plug on the driver’s side of the gearbox housing, just in front of the CV axle.
- The drain plug can be located through the hole in the rear passenger side of the metal transmission cover.
- IMPORTANT: Just below the fill plug, place duck tape along the seam where the PDK transmission pan and engine meet. This will prevent dirt from getting in when you fill the PDK clutch oil.
- Remove the fill bolt with an 8mm hex socket. If you cannot get the fill bolt off, STOP and do not drain the fluid or you will be unable refill the transmission oil.
- If you can remove it, proceed to the next step.
Step 4: Drain the PDK clutch oil
- Locate the PDK drain bolt as shown in this video from Verus Engineering.
- Position the drain pan underneath the PDK clutch oil drain bolt.
- Use a T27 torx socket to break loose the oil drain bolt.
- Unscrew the drain bolt and be sure not to let it fall into the drain pan.
- Allow the PDK clutch oil to drain for 15 minutes.
- Note: If you are not replacing the PDK transmission pan and filter, skip the next two steps.
Step 5: Remove the support plate (if replacing PDK transmission pan)
- Note: If you are not replacing the PDK transmission pan, skip this step.
- As shown in the video from Tobe Tinkering, unscrew the 15mm fasteners holding the diagonal braces in place, then remove the diagonal braces.
- Unscrew the 15mm fasteners holding the support plate, then remove the support plate.
- Note: With the diagonal braces and support plate, the wheels cannot support the vehicle. If you need to put the wheels on the ground, reinstall these parts first. Also, any time you loosen or remove the diagonal braces, you will need to get an alignment afterwards.
Step 6: Replace the PDK transmission pan (if replacing)
- Note: If you are not replacing the PDK transmission pan, skip this step.
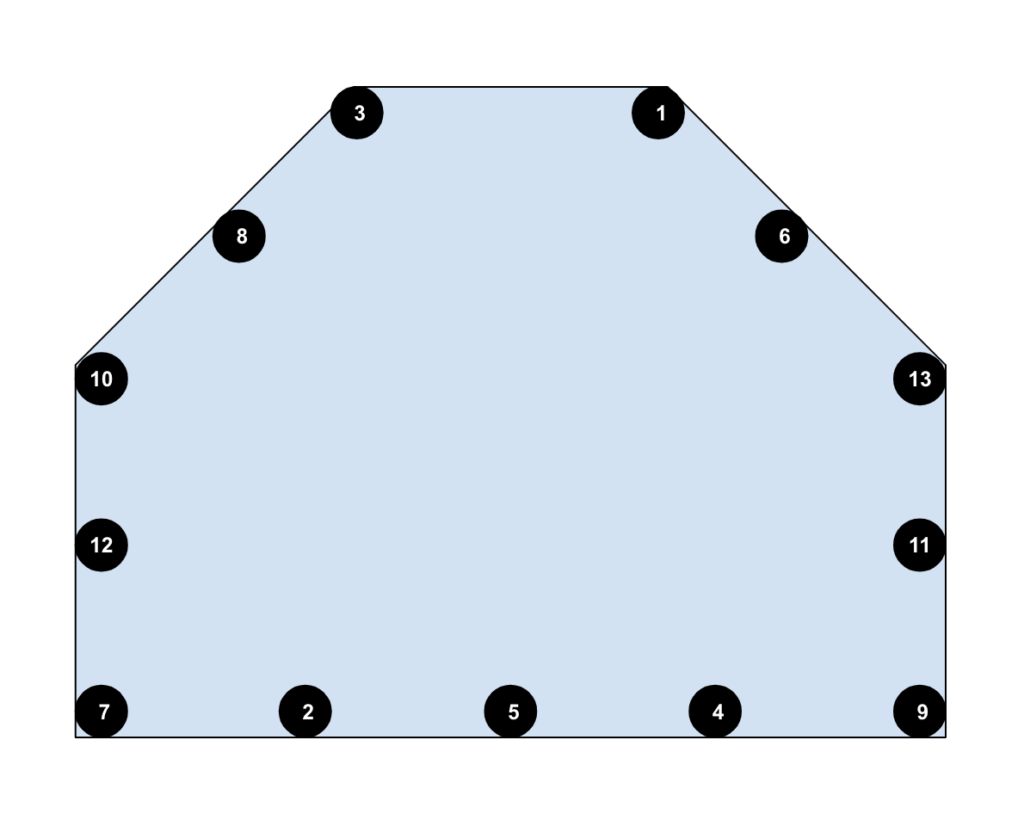
- When the oil stops draining, locate and remove the 13 T30 Torx screws that hold the transmission pan in place.
- Remove the transmission pan.
- Be sure to remove the main transmission pan seal along with the o-ring seal on the oil intake connection.
- Install new transmission pan, using supplied new seals and screws; ensure all the seals fit correctly.
- Screw in the new screws, but do not fully tighten them.
- As shown in the picture, torque the transmission pan screws to 2 ft-lbs using a 1/4″ torque wrench in this specific sequence; this will help ensure your transmission pan is screwed on evenly.
- Be sure not to over-torque the transmission pan screws.
Step 7: Add new PDK clutch oil
- IMPORTANT: Be sure you are using the correct PDK clutch oil, which is Pentosin Synthetic FFL-3 (linked in the parts section). Also, you will need to ensure your car is level in order to reach the correct oil level.
- Install a NEW drain bolt and torque it to 11 ft-lbs. Do not over torque it!
- Place a drain pan beneath the fill hole.
- Add ~5.2 liters of PDK clutch fluid in the fill bolt hole using a fluid transfer pump as shown in the video from BleepinJeep.
- If you did not use a PIWIS, you may not have drained all the oil clutch oil, so just stop filling the transmission once clutch fluid begins to drip out of the fill hole.
- Note: Do not reuse fluid pump for any other fluids unless you clean everything out thoroughly.
Step 8: Ensure PDK clutch oil is filled to the correct level
- Start the car and shift the gearbox lever through the R-N-D while pausing for one second at each position; then put the gear lever into Park.
- Connect a PIWIS diagnostic tool to the vehicle and allow the clutch oil to get between 30 and 40°C; you can either determine this using the PIWIS tool or by measuring the temperature of the clutch oil that drips out using an infrared thermometer. 30-40°C will feel warm to the touch.
- Once the clutch oil is between 30-40°C, use the PIWIS to engage “Fill Mode”.
- If clutch oil does not drip out during “Fill Mode”, add more clutch oil until it does.
- Once the clutch oil stops dripping out, you’ve reached the correct level.
- Install a NEW clutch oil fill bolt and torque it to 20 ft-lbs.
- Note: If you don’t have a PIWIS, don’t worry about “fill mode”. Just follow the above steps, but use a pyrometer to measure the temperature of the oil.
Step 9: Reinstall everything in reverse
- Ensure there are no fluid leaks.
- Reinstall the diagonal braces and support plate and use the following torque specs:
- Torque support plate fasteners to 48 ft-lbs.
- Torque fasteners that connect the diagonal braces to the support plate and rear axle cross member to 48 ft-lbs.
- Torque fasteners that connect diagonal braces to vehicle body to 22 ft-lbs, then tighten them an additional 1/4 turn.
- Lower your vehicle back on the ground.
- Clean up your work area and put away your tools.
- Note: If you replaced the PDK transmission pan, you will need to get an alignment.



Justin McCarty says:
Very helpful, thanks a lot!!