Changing your transfer case oil is important to keep your drivetrain smooth. Over time, the oil loses its critical properties that prevent metal on metal contact. This is a cheap and easy do-it-yourself as long as you have the proper tools and ability to get your vehicle off the ground safely.
While Porsche recommends owners change the transfer case fluid every 16 years or 160,000 miles, we believe this is too long. For an overview of the procedure, check out the above DIY from the YouTube channel, Johnny Five. Detailed steps, parts, and tools required can be found below.
- Mechanic’s Tool Set
- K Tool International Low Profile Jack (3.33 Ton)
- ESCO 10498 Performance Jack Stands (Pair) (4 jack stands required)
- Wheel Chocks
- 3/8 Inch Drive Click Torque Wrench (10-80 ft.-lb.)
- Metric Hex Bit Socket Set, 3mm to 10mm
- Fluid Transfer Pump Kit
- Oil Drain Pan, 6 Quarts Capacity
- Safety Glasses
- Disposable Gloves
Drain and fill bolts: 13 ft-lbs
Transfer case oil capacity: 0.78 liters
Step 1: Prepare your vehicle and work area.
- Starting with a COLD engine, take your car for a quick 5 minute drive to warm up the drivetrain fluids. This will help the oil drain more easily.
- Park your car on a flat surface.
- Gather required tools and parts.
- Put on gloves and eye protection.
Step 2: Raise your vehicle to give yourself extra clearance.
- If you have air suspension, simply raise your car to the highest ride height.
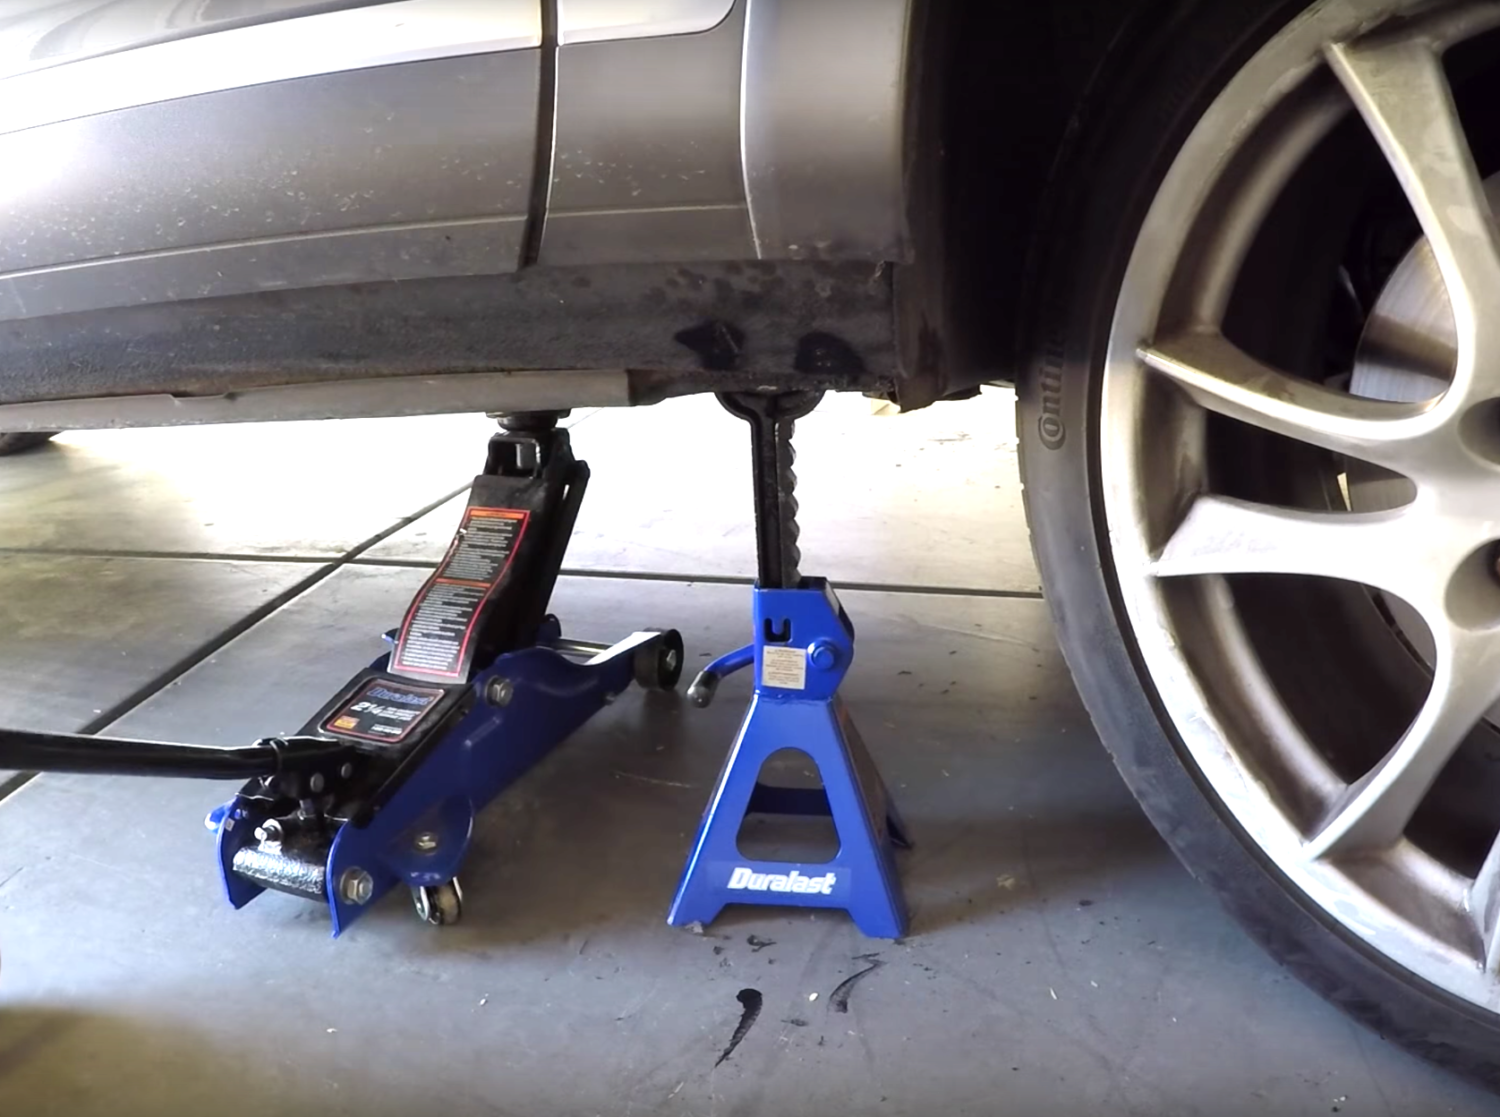
- If not, raise your vehicle with a lift or jack stands; it is very important your car is level during the procedure.
- If using a jack and jack stands, be sure to engage parking brake and use wheel chocks to prevent your car from rolling.
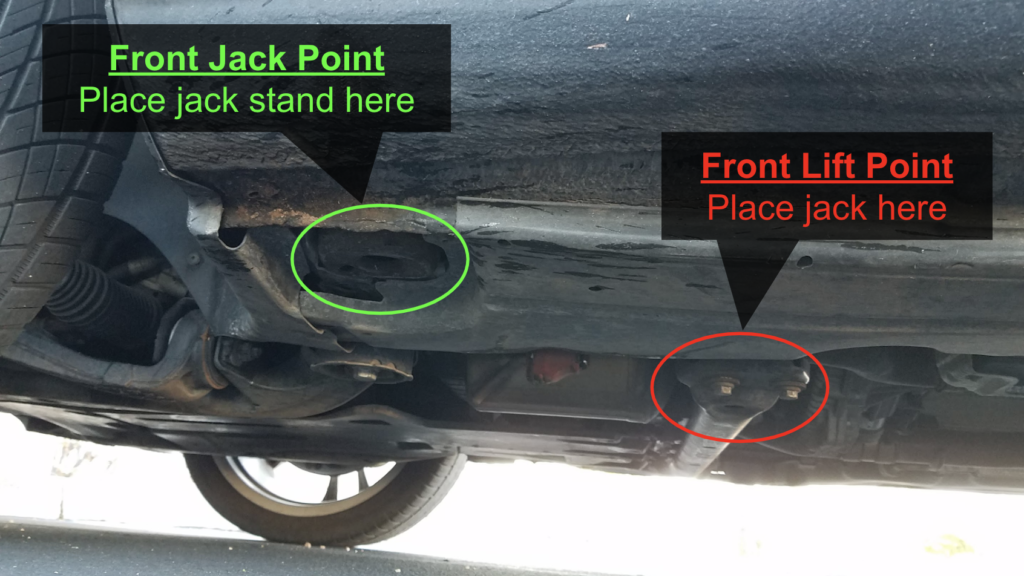
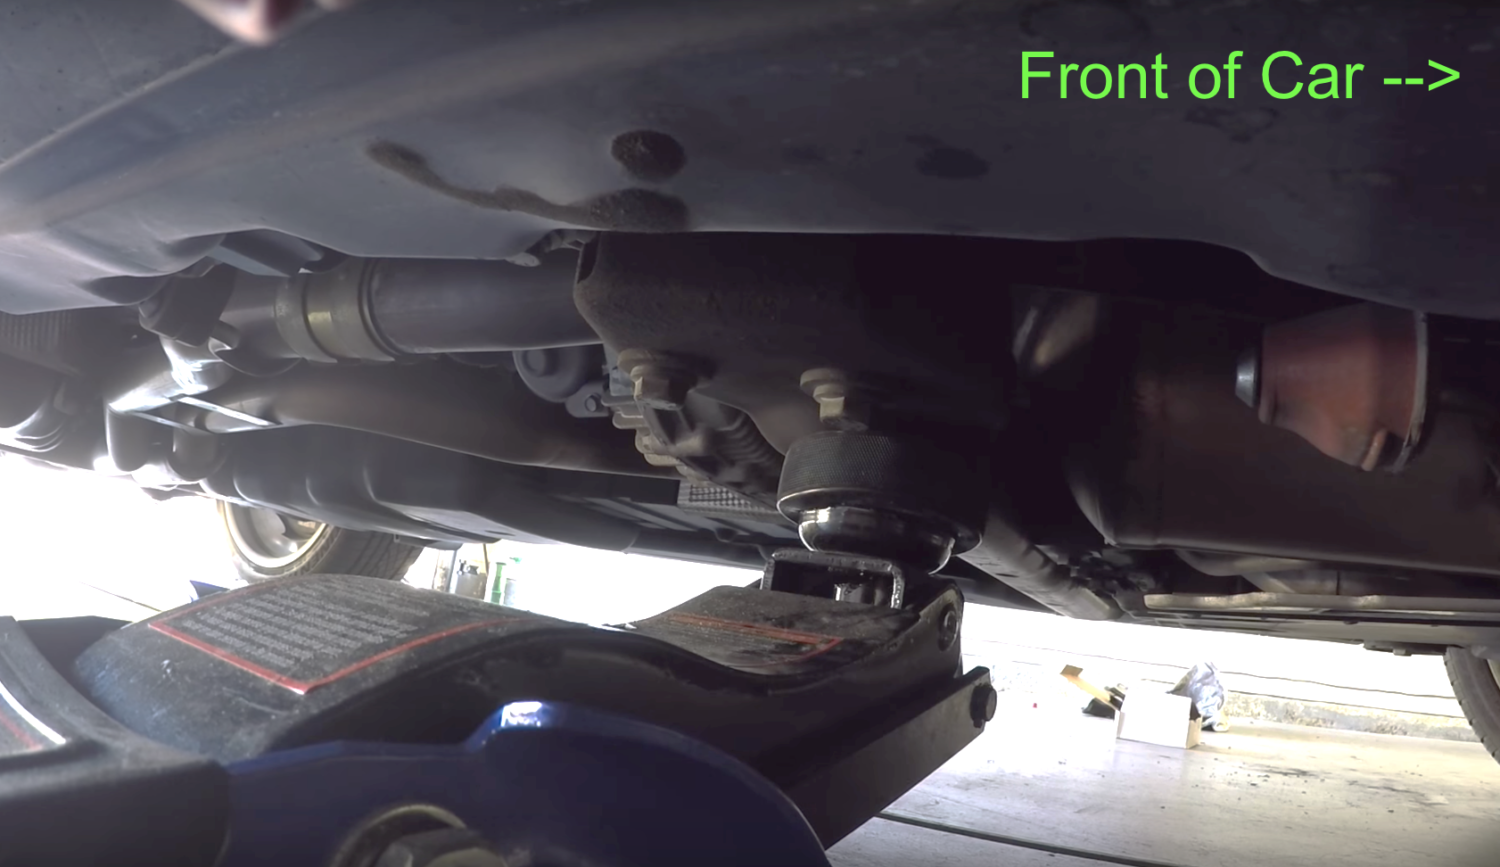
- To get jack stands on the front jack points, jack the vehicle by the center cross member as shown in the photos.
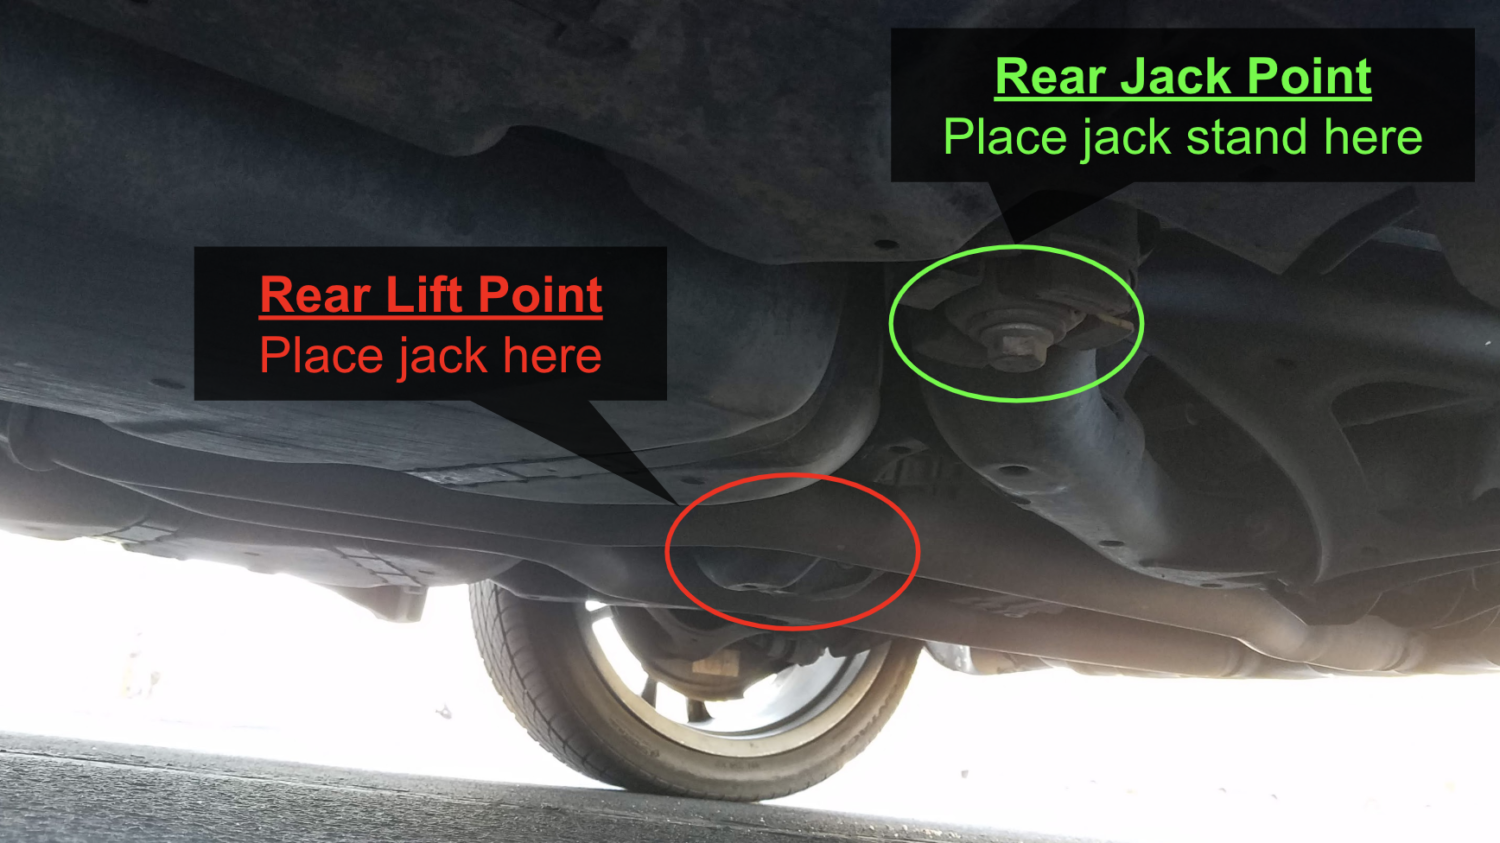
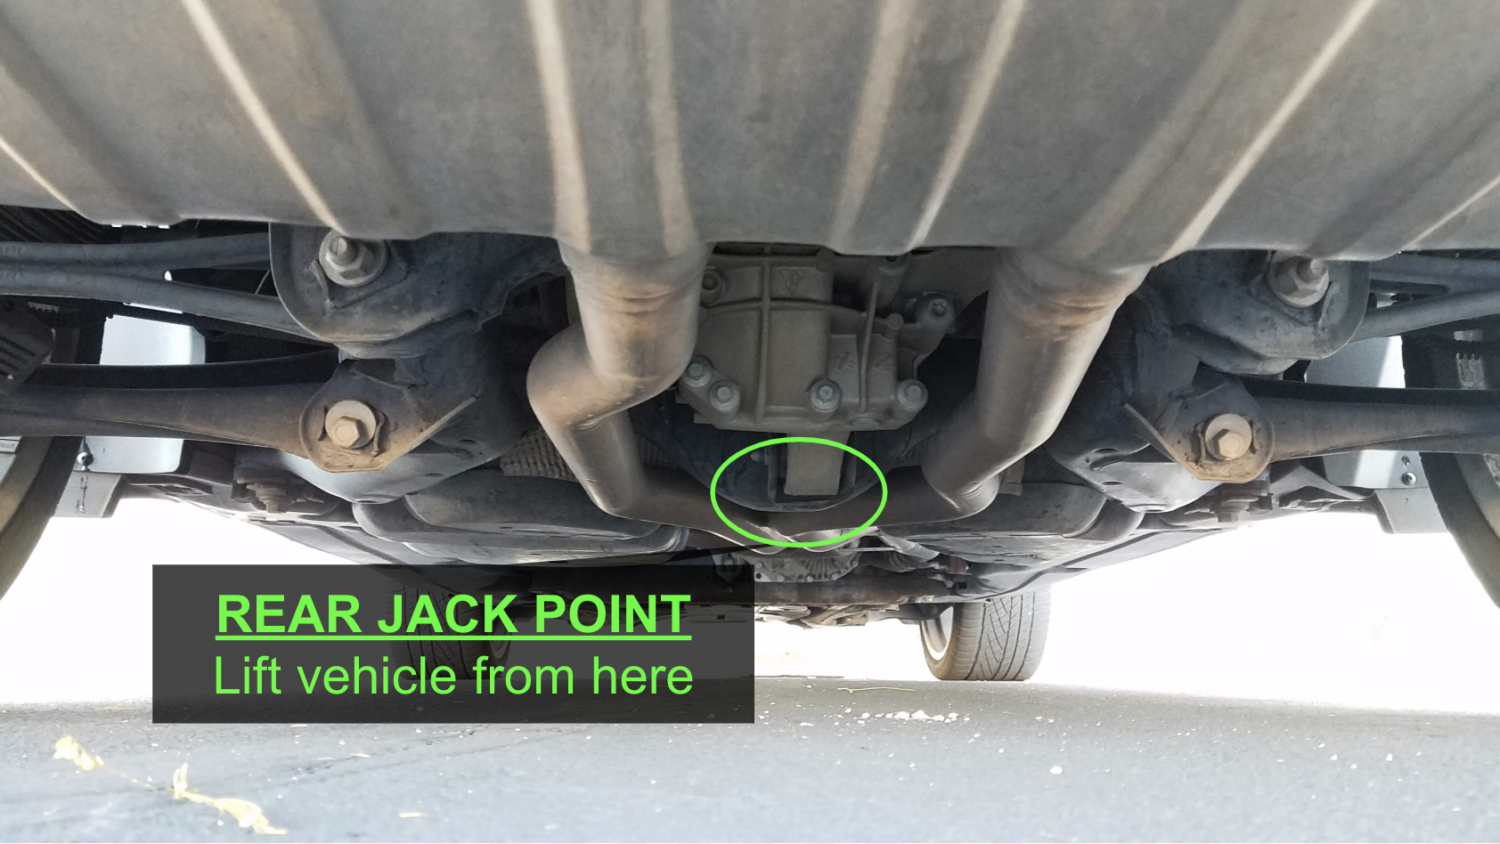
- To get jack stands on the rear jack points, jack the vehicle up be the rear cross member which is just ahead of the rear differential and in between the exhaust pipes.
- NEVER rely on a jack to support your vehicle.
- Note: If you have air suspension and decided to jack up the car, you will need to lock the air suspension by starting the car and holding the air suspension button up for 10 seconds. You will see an indicator pop up on your gauge cluster.
Step 3: Remove the underbody trays.
- Remove front underbody trays, which are held on by several T25 Torx screws and 10mm bolts.
- Also remove the panel covering the mid section of the vehicle, which is held on by 10mm bolts.
- Crawl under the vehicle and locate the transfer case (towards middle of vehicle).
Step 4: Remove the transfer case fill bolt.
- You should see two 8mm hex bolts; the one on the bottom is the drain bolt while the one located higher is the fill bolt.
- Begin by removing the fill bolt using an 8 mm socket and a ratchet; if you have issues loosening the fill bolt, apply some heat to it.
- If you cannot get the fill bolt off, STOP and do not proceed with the procedure.
Step 5: Drain the transfer case.
- Place a drain pan under the drain plug.
- Remove the drain plug using an 8mm hex bit and ratchet.
- Allow the differential to drain for 15 minutes.
Step 6: Fill the transfer case with fresh fluid.
Note: Be sure to use a calibrated torque wrench to tighten the drain and fill plugs. Do not over-tighten or you can crack your transfer case!
- Install the drain bolt and torque it to 13 ft-lbs.
- Fill your transfer case via the fill port; the capacity is ~0.78 liter.
- Attach the fluid pump to your container of ATF and pump fluid into the transfer case via the fill hole as shown in this video from BleeinJeep.
- Once the fill port begins to overflow, you’ve filled the transfer case to capacity.
- Install the fill bolt and torque it to 13 ft-lbs.
- Note: We recommend you install new drain and fill bolts; however, if you do not have new ones, make sure your old drain and fill bolts are in good condition before re-using it.
Step 7: Lower your vehicle.
- Re-install the underbody panel and lower your car.
- Store the old ATF in a plastic container, so you can take it to your nearest auto parts store to recycle.
- Clean up your workspace and put all of your tools and supplies away.
- You’re all done!


