Engine oil is vital to your car’s engine. It’s primary function is to protect internal moving parts by providing lubrication to reduce friction and metal on metal contact. Over time the oil loses its critical properties, so regular replacement of the oil and filter are essential to maintaining your vehicle’s engine.
Volkswagen recommends changing the engine oil and filter every 10,000 miles or 1 year. However, we recommend replacing your engine oil every 5,000 miles if you want to keep your engine healthy for years to come. While it may be intimidating to work on your Volkswagen, changing the oil and filter isn’t much different than on other vehicles. This is a great entry-level maintenance procedure that you can perform yourself and save yourself money on year after year.
To perform this DIY, check out the tutorial above from YouTube channel, HowToDoYourself. While the video covers the steps for a 3.2L V6 Touareg models, but it also applies to later 3.6L models. Detailed steps can be found below.
- 36MM Oil Filter Cap Socket (for oil filter cap)
- 19mm 3/8 Inch Drive Socket (for oil drain plug)
- Safety Glasses
- Disposable Gloves
- Mechanic’s Tool Set
- 3/8 Inch Drive Click Torque Wrench (10-80 ft.-lb.)
- Magnetic Torx Screwdrivers Set, T5 to T40
- Oil Drain Pan, 16 Quarts Capacity
- Oil Drain Pan, 6 Quarts Capacity
- Long Neck Fluid Funnel
- Low Profile Vehicle Ramps, 2.2 Ton Capacity, Pair
Engine oil capacity (3.2L): 6.6 liters
Engine oil capacity (3.6L): 6.9 liters
Oil pan drain plug: 22 ft-lbs / 30 Nm
Oil filter housing: 17 ft-lbs / 23 Nm
Oil filter drain plug: 7ft-lbs / 10 Nm
Step 1: Prepare your vehicle and work area.
- Drive the car for 5 minutes to warm up the engine. This will help the engine oil drain more easily.
- Position vehicle on a flat surface.
- Gather required tools and parts
- Put on gloves and eye protection.
- Open the hood and remove the oil fill cap, which will help the engine oil flow more easily.
Step 2: Raise the front of your vehicle to give yourself extra clearance.
- If you have air suspension, simply raise your car to the highest ride height.
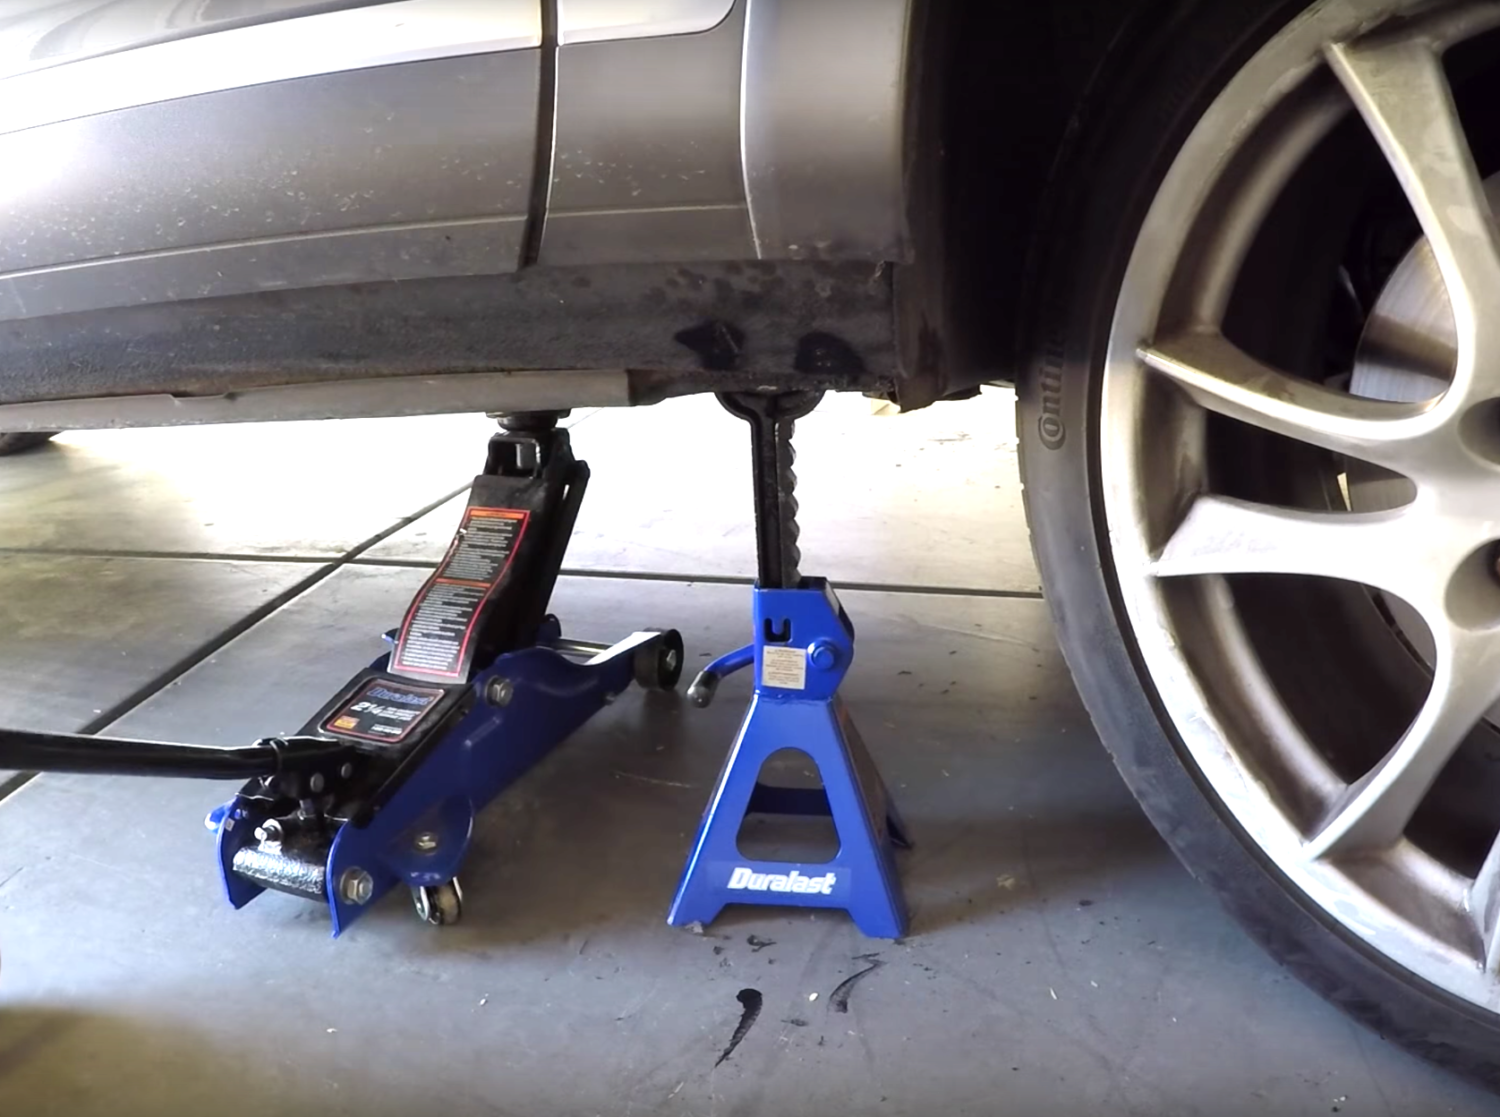
- If not, raise the front of vehicle via vehicle ramps or jack stands.
- Be sure to use wheel chocks and the parking brake to prevent your car from rolling.
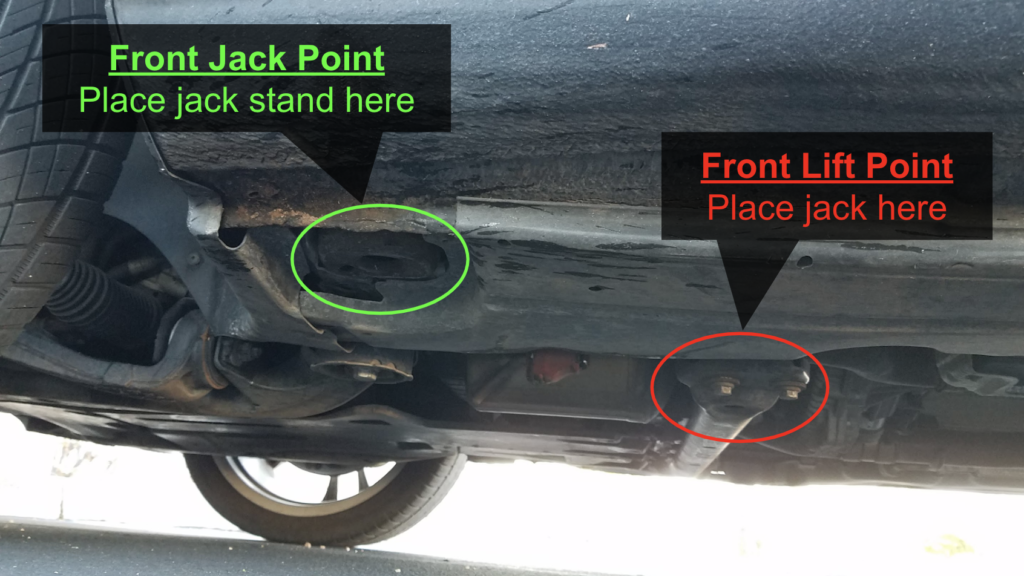
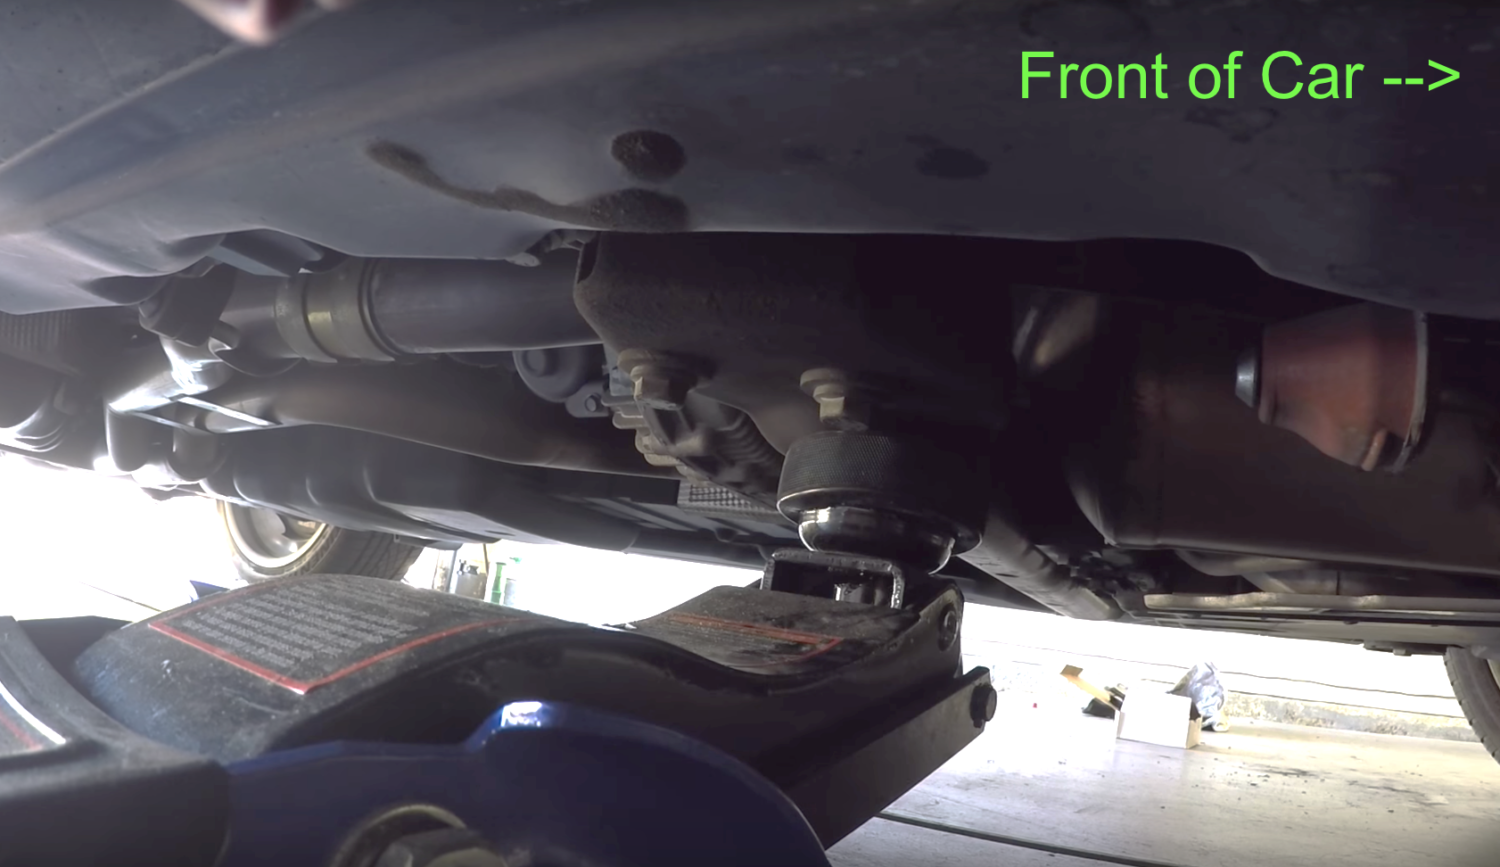
- To get jack stands on the front jack points, jack the vehicle by the center cross member as shown in the photos.
- NEVER rely on a jack to support your vehicle.
- Note: If your vehicle has air suspension, set the vehicle to “Jack Mode” by holding the air suspension button up for 10 seconds. You will see a confirmation message on the gauge cluster.
Step 3: Remove the front underbody tray.
- Remove front underbody tray, which is held on by several T30 and T15 Torx screws.
Step 4: Remove the oil drain plug and drain the engine oil.
- Locate the oil drain plug and place a drain pan underneath.
- Remove oil drain plug using an 19mm socket; be sure to grab the plug so it doesn’t fall into the drain pan.
- Allow the engine oil to drain for 15 minutes.
Step 5: Drain and remove the engine oil filter cap.
- While the oil is draining, locate the oil filter cap which is located underneath the engine and forward of the oil drain pan.
- Place a small drain pan underneath to catch any dripping oil.
- Drain the oil filter cap for 1 minute by removing the drain plug with a 5 mm hex wrench.
- Remove the oil filter cap using a 36mm socket.
Step 6: Replace the engine oil filter.
- Remove the old engine oil filter.
- Replace the oil filter cap o-ring seal with a brand new one, which should have been included with the new engine oil filter.
- Reinstall the oil filter drain plug with a new o-ring and torque it to 7 ft-lbs or slightly by hand.
- Insert the new oil filter into the oil filter housing cap.
- Lightly coat the o-ring seal on the oil filter housing cap with fresh oil.
- Add a small amount of engine oil to your oil filter housing cap, which will help lubricate your engine on initial start-up.
- Re-install the new oil filter and cap and torque it to 19 ft-lbs.
Step 7: Re-install the oil drain plug.
- After allowing the oil to drain for 15 minutes, screw in a brand new oil drain plug and crush washer by hand initially.
- Torque the drain plug to 22 ft-lbs.
- Be sure to use a brand new crush washer or you engine oil may leak.
Step 8: Add new engine oil.
- Now it’s time to add engine oil.
- The oil capacity for the 3.2L and 3.6L engines are respectively 6.6 liters and 6.9 liters.
- To prevent from overfilling the oil, start by adding 0.5 liters less than the oil capacity.
- Ensure there are no leaks from underneath the vehicle.
Step 9: Re-install the underbody panels and lower the car back down.
Step 10: Top off the engine oil as needed.
- Take the car for a short drive and get the engine oil up to operating temperature.
- Park your car, turn off the engine, and allow the car to sit for 5 minutes.
- Open the hood and check the engine oil level using the dipstick.
- To do this, pull the dipstick out and wipe the tip dry with a clean paper towel.
- Reinsert the dipstick all the way, remove it, and check the oil level.
- The difference between the “min” and “max” levels is ~1.5 quarts.
- If necessary, add oil in 0.25 quart increments and recheck the oil level until the engine oil level is between the minimum and maximum levels.
Step 11: Reset the service indicator.
- Reset the service indicator as shown in the video Didi Dragon.
- With the ignition on, press the CAR Infotainment button.
- Tap the Service function key on the screen.
- Then tap the Reset Interval Service function key and confirm.
Step 12: Clean up your work area.
- Put your used engine oil in a container and take to your nearest auto parts store to recycle during your next trip.
- Clean up your work area and put up your tools. You’re all done!


